In 2022 I moved to Chattanooga and began working as an upholsterer within the aviation industry. I continued to develop my abilities as an upholsterer to meet the standards of the demanding and high-speed aviation industry.


When I first started in the aviation industry, I was responsible mostly for sculpting foam, flat panel recovery, seat disassembly and cover installation. Given my prior experience I was familiar with these sorts of things, but they were still foundational in deepening my understanding of how exactly these planes and their respective pieces go together. Eventually I was given items such as the lavatory seat cover seen above. Due to the fast paced, near production level speed of aviation, I didn’t always have time to take tons of photographs of the things I was working with or producing, not to mention that due to the nature of working with “private aircraft” photography isn’t “encouraged”. Above is one such example where that wasn’t the case. It looks simple in its construction, but with aviation requiring a high level of finish on all sides of any given object I made sure to measure everything I could to get as close to perfection as I could. This involved skiving leather, particular placement of trimmed and folded selvage, having equal pull in all areas, and in general maintaining a high-level of consistency across the entire piece. This is just one particular example of many things I made in my nearly two and a half years within the aviation industry, as I would go on to work with many, much more complex pieces.


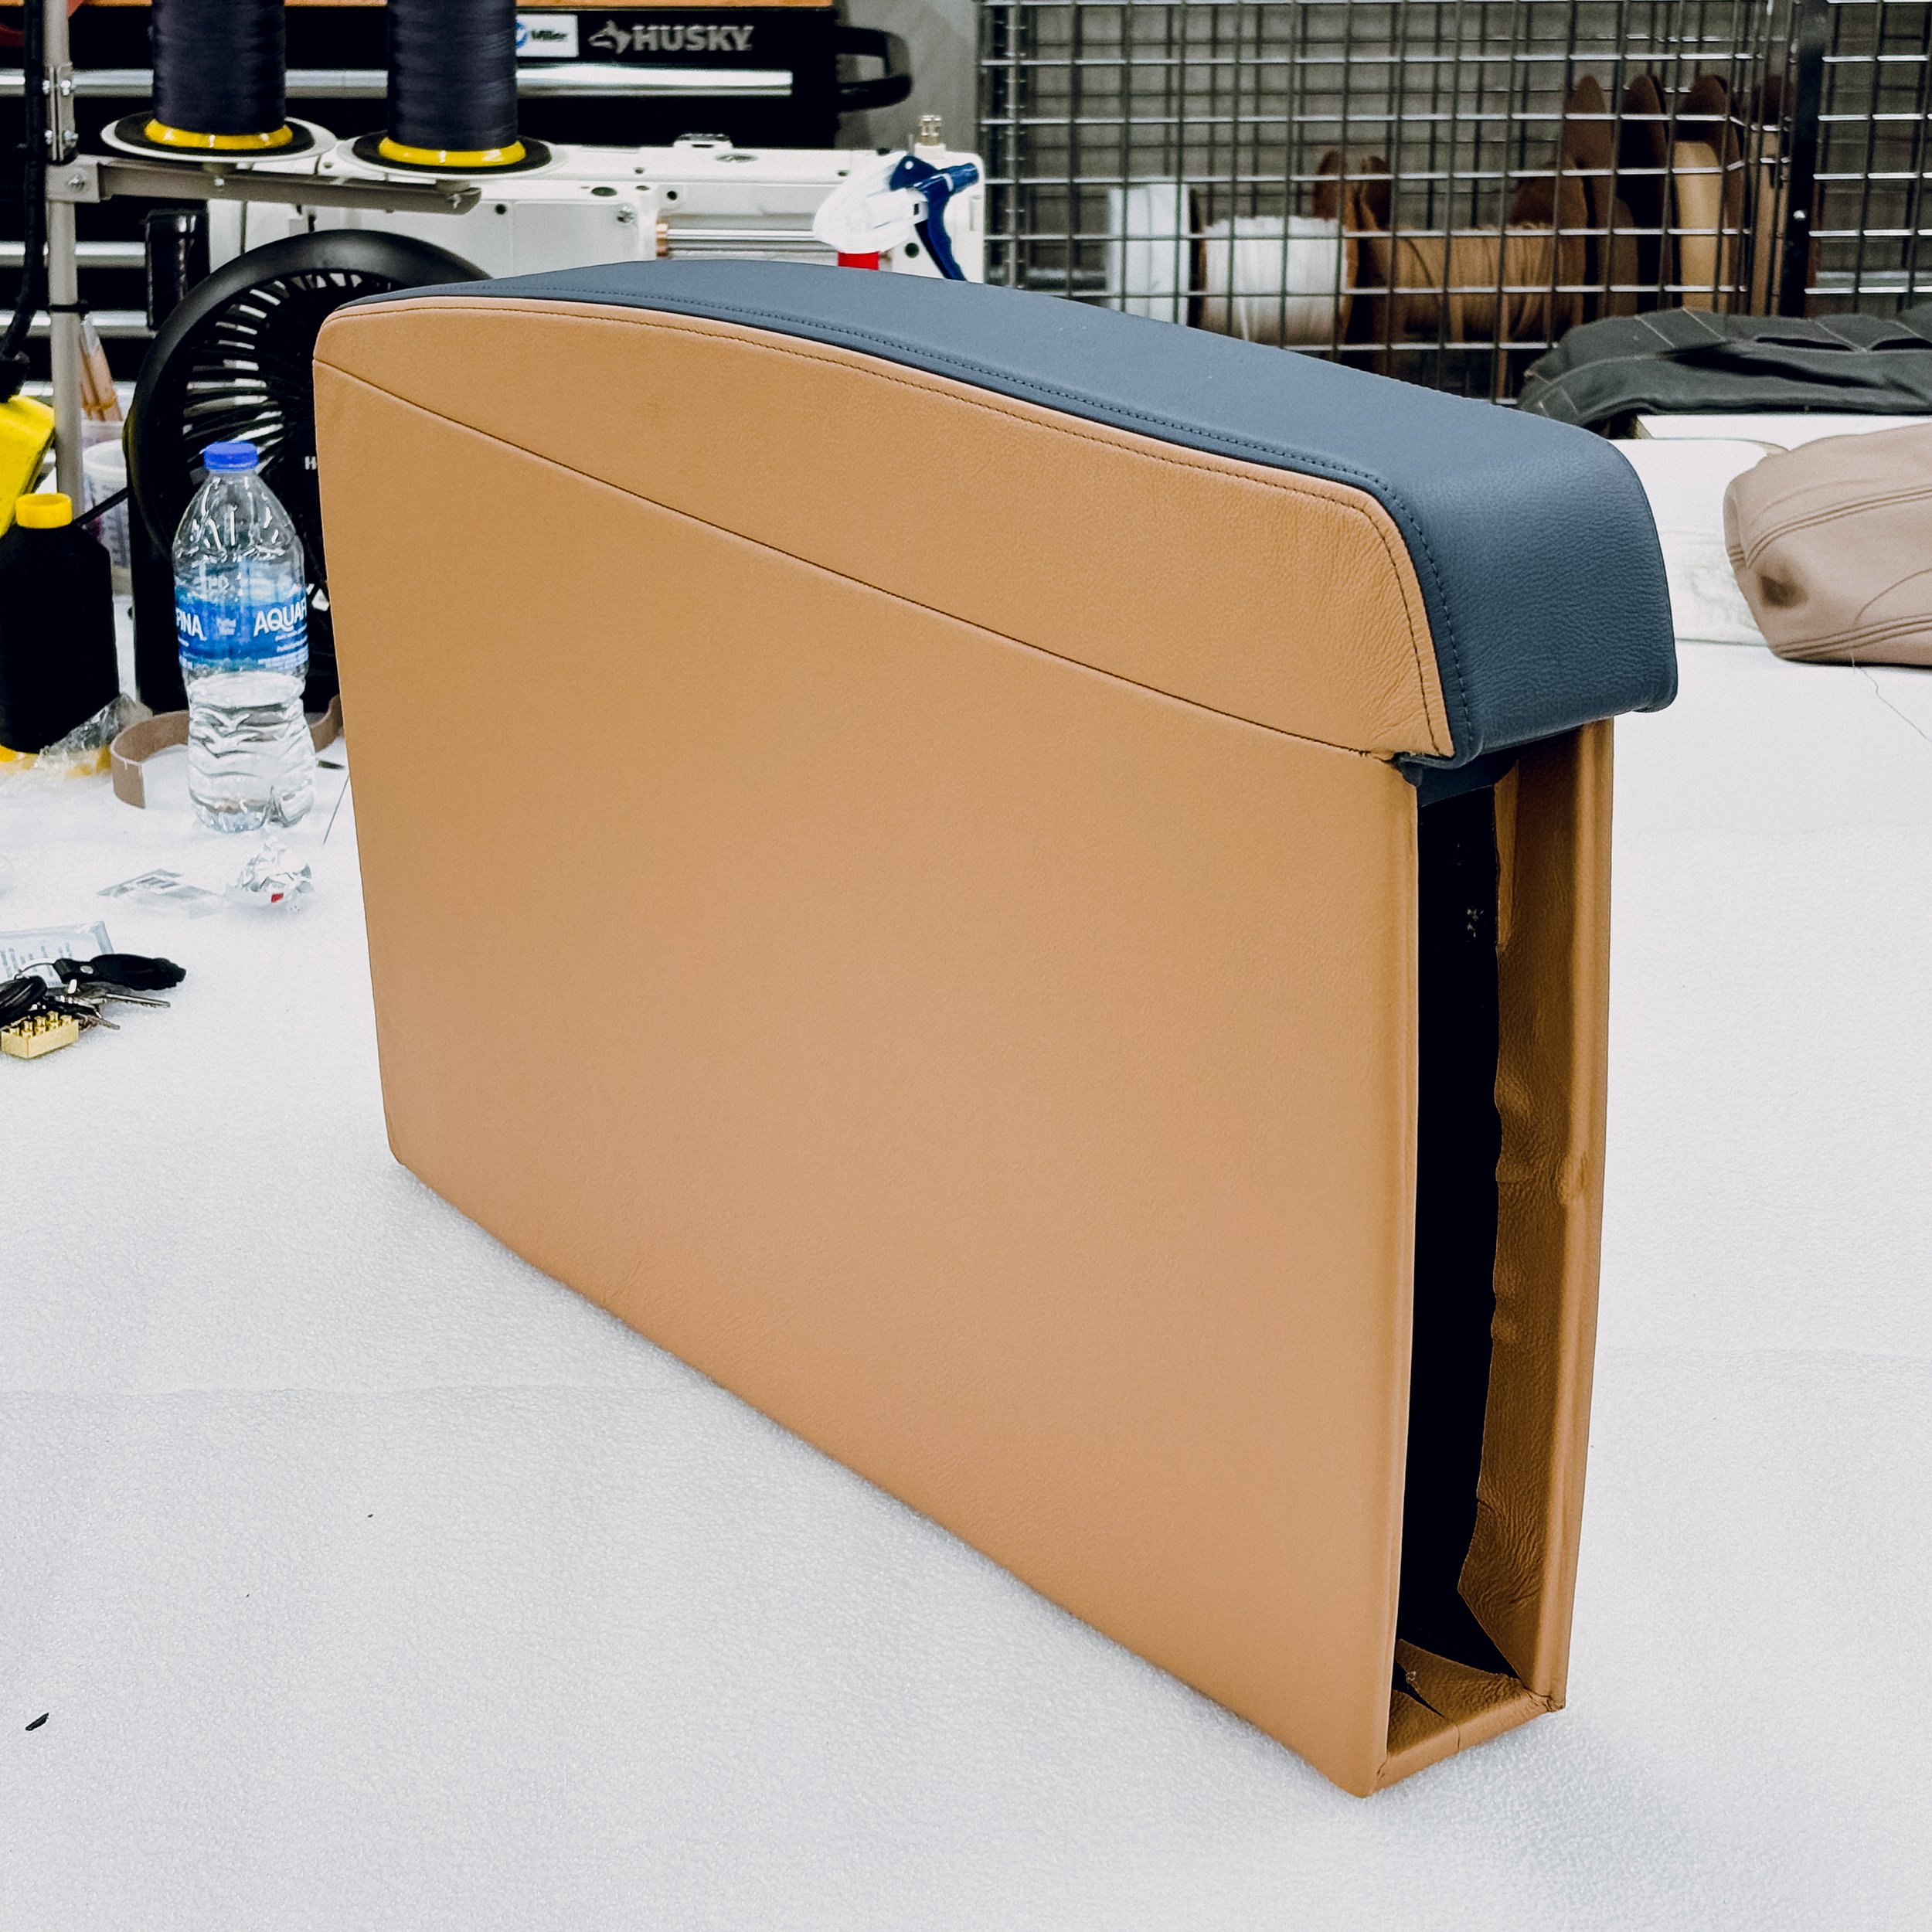
One of the challenges of working within aviation is the slight variation between two pieces that seemingly should be identical. These differences are only perceptible to those with experience and familiarity with the subject matter. I was regularly responsible for armrests and even in components from the same seat, there were demonstrable differences that were a result a myriad of variables introduced long before I could get my hands on the piece. In order to minimize the visibility of these differences I had to approach each piece I worked with with considerable forethought in my approach. This usually involved meticulous measuring, note taking, and side by side comparison all while under the always increasing time crunch that comes with working in aviation. The set of divan arm rests above while more simplistic in form, presented a great initial challenge as the differences between their foam was surprisingly vast and re-foaming them was not within the scope of the project. In order to have them match as closely as I was able to, aforementioned meticulous effort was applied as well as repeated attempts at installation to maintain a consistent look across both arms.
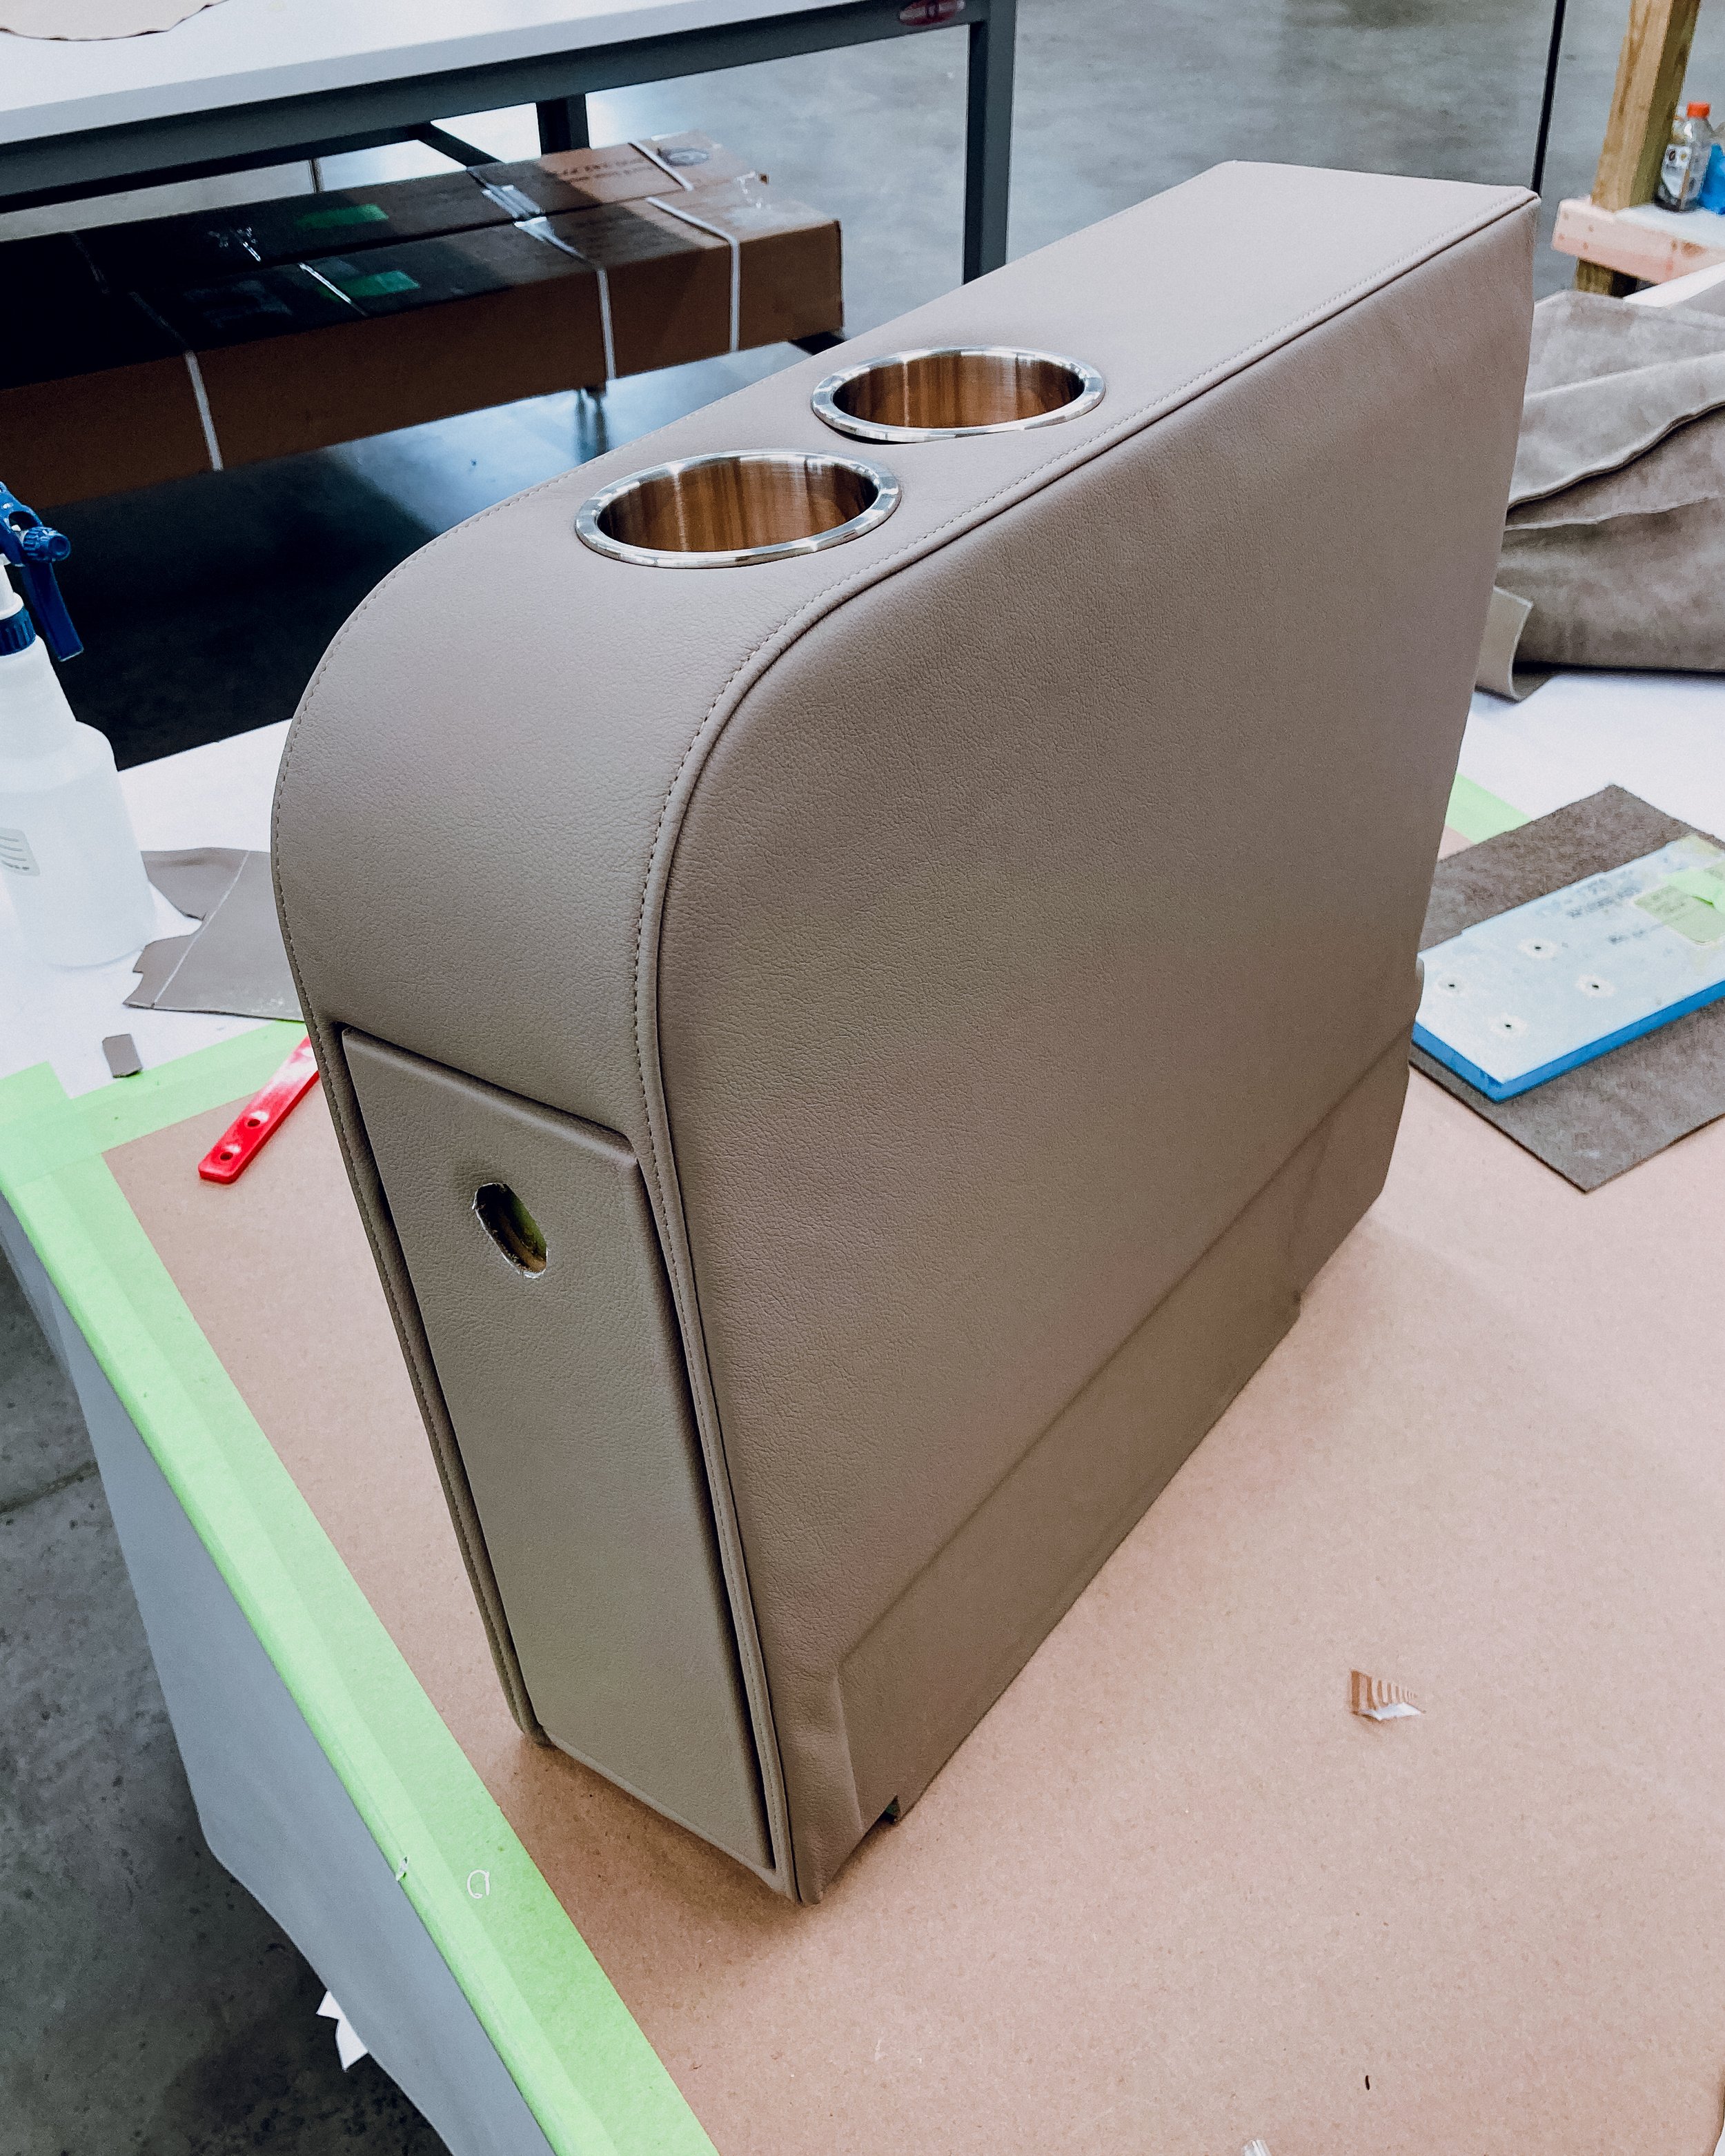
As I continued to establish myself within aviation upholstery I was given increasingly more complex things to work with. The arm rest above is one of a set, with this arm being the less complex of the two. It was common place to have arms with radiused fronts and small doors within the face of the arm, but the jagged, curved rear end was more unusual, at least in my experience. Having to secure the cover around the backside, cleanly and without having visible wrinkling or two visible directions of pull while also maintaining tightness down the sides of the arm made it quite challenging. As you can see I was able to accomplish this and have all visible areas of the armrest be finished as they should be. The companion arm to this one was a clamshell design that had the top section open perpendicular to the arm, with the material of hinged side being one piece. The underside of the clamshell was made from one piece that connected to the top band and had to finish cleanly while hiding the hinge. The lower two-thirds of the armrest looked as this one does, door and all. Doing all this and ensuring that the top-stitch met as it should and the cover fit tightly was an exercise in patience and required lots of experimentation.

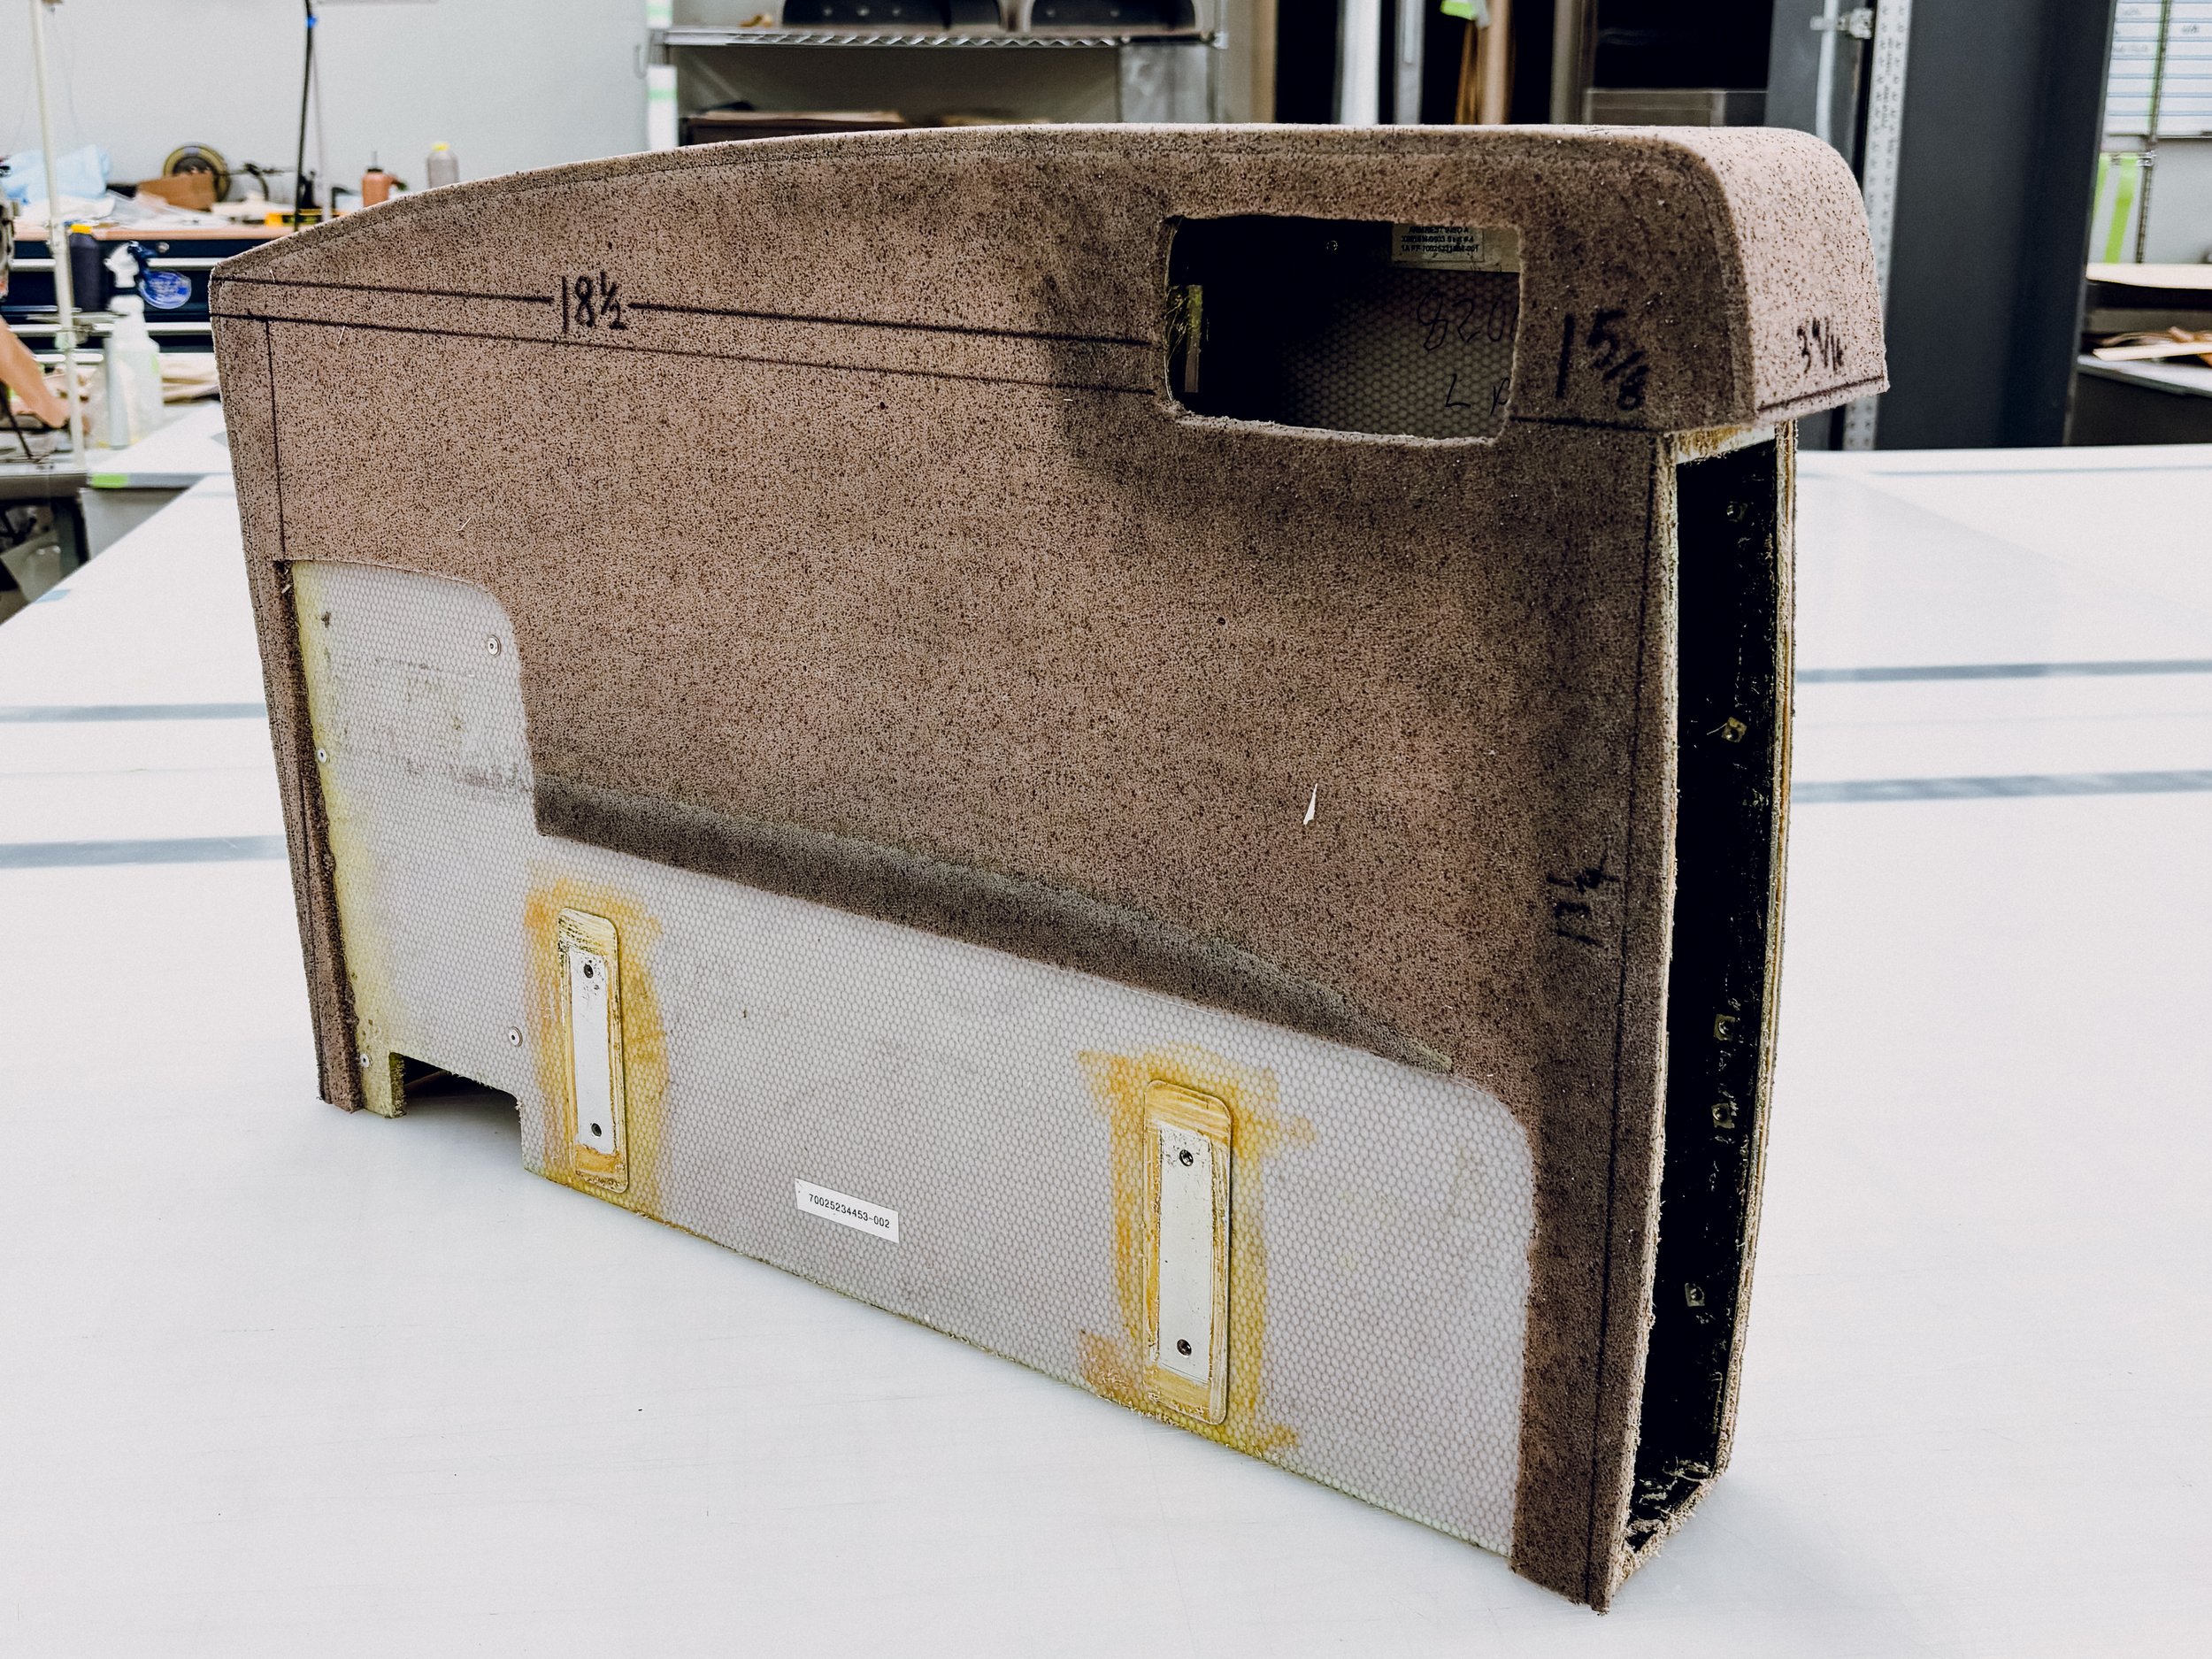
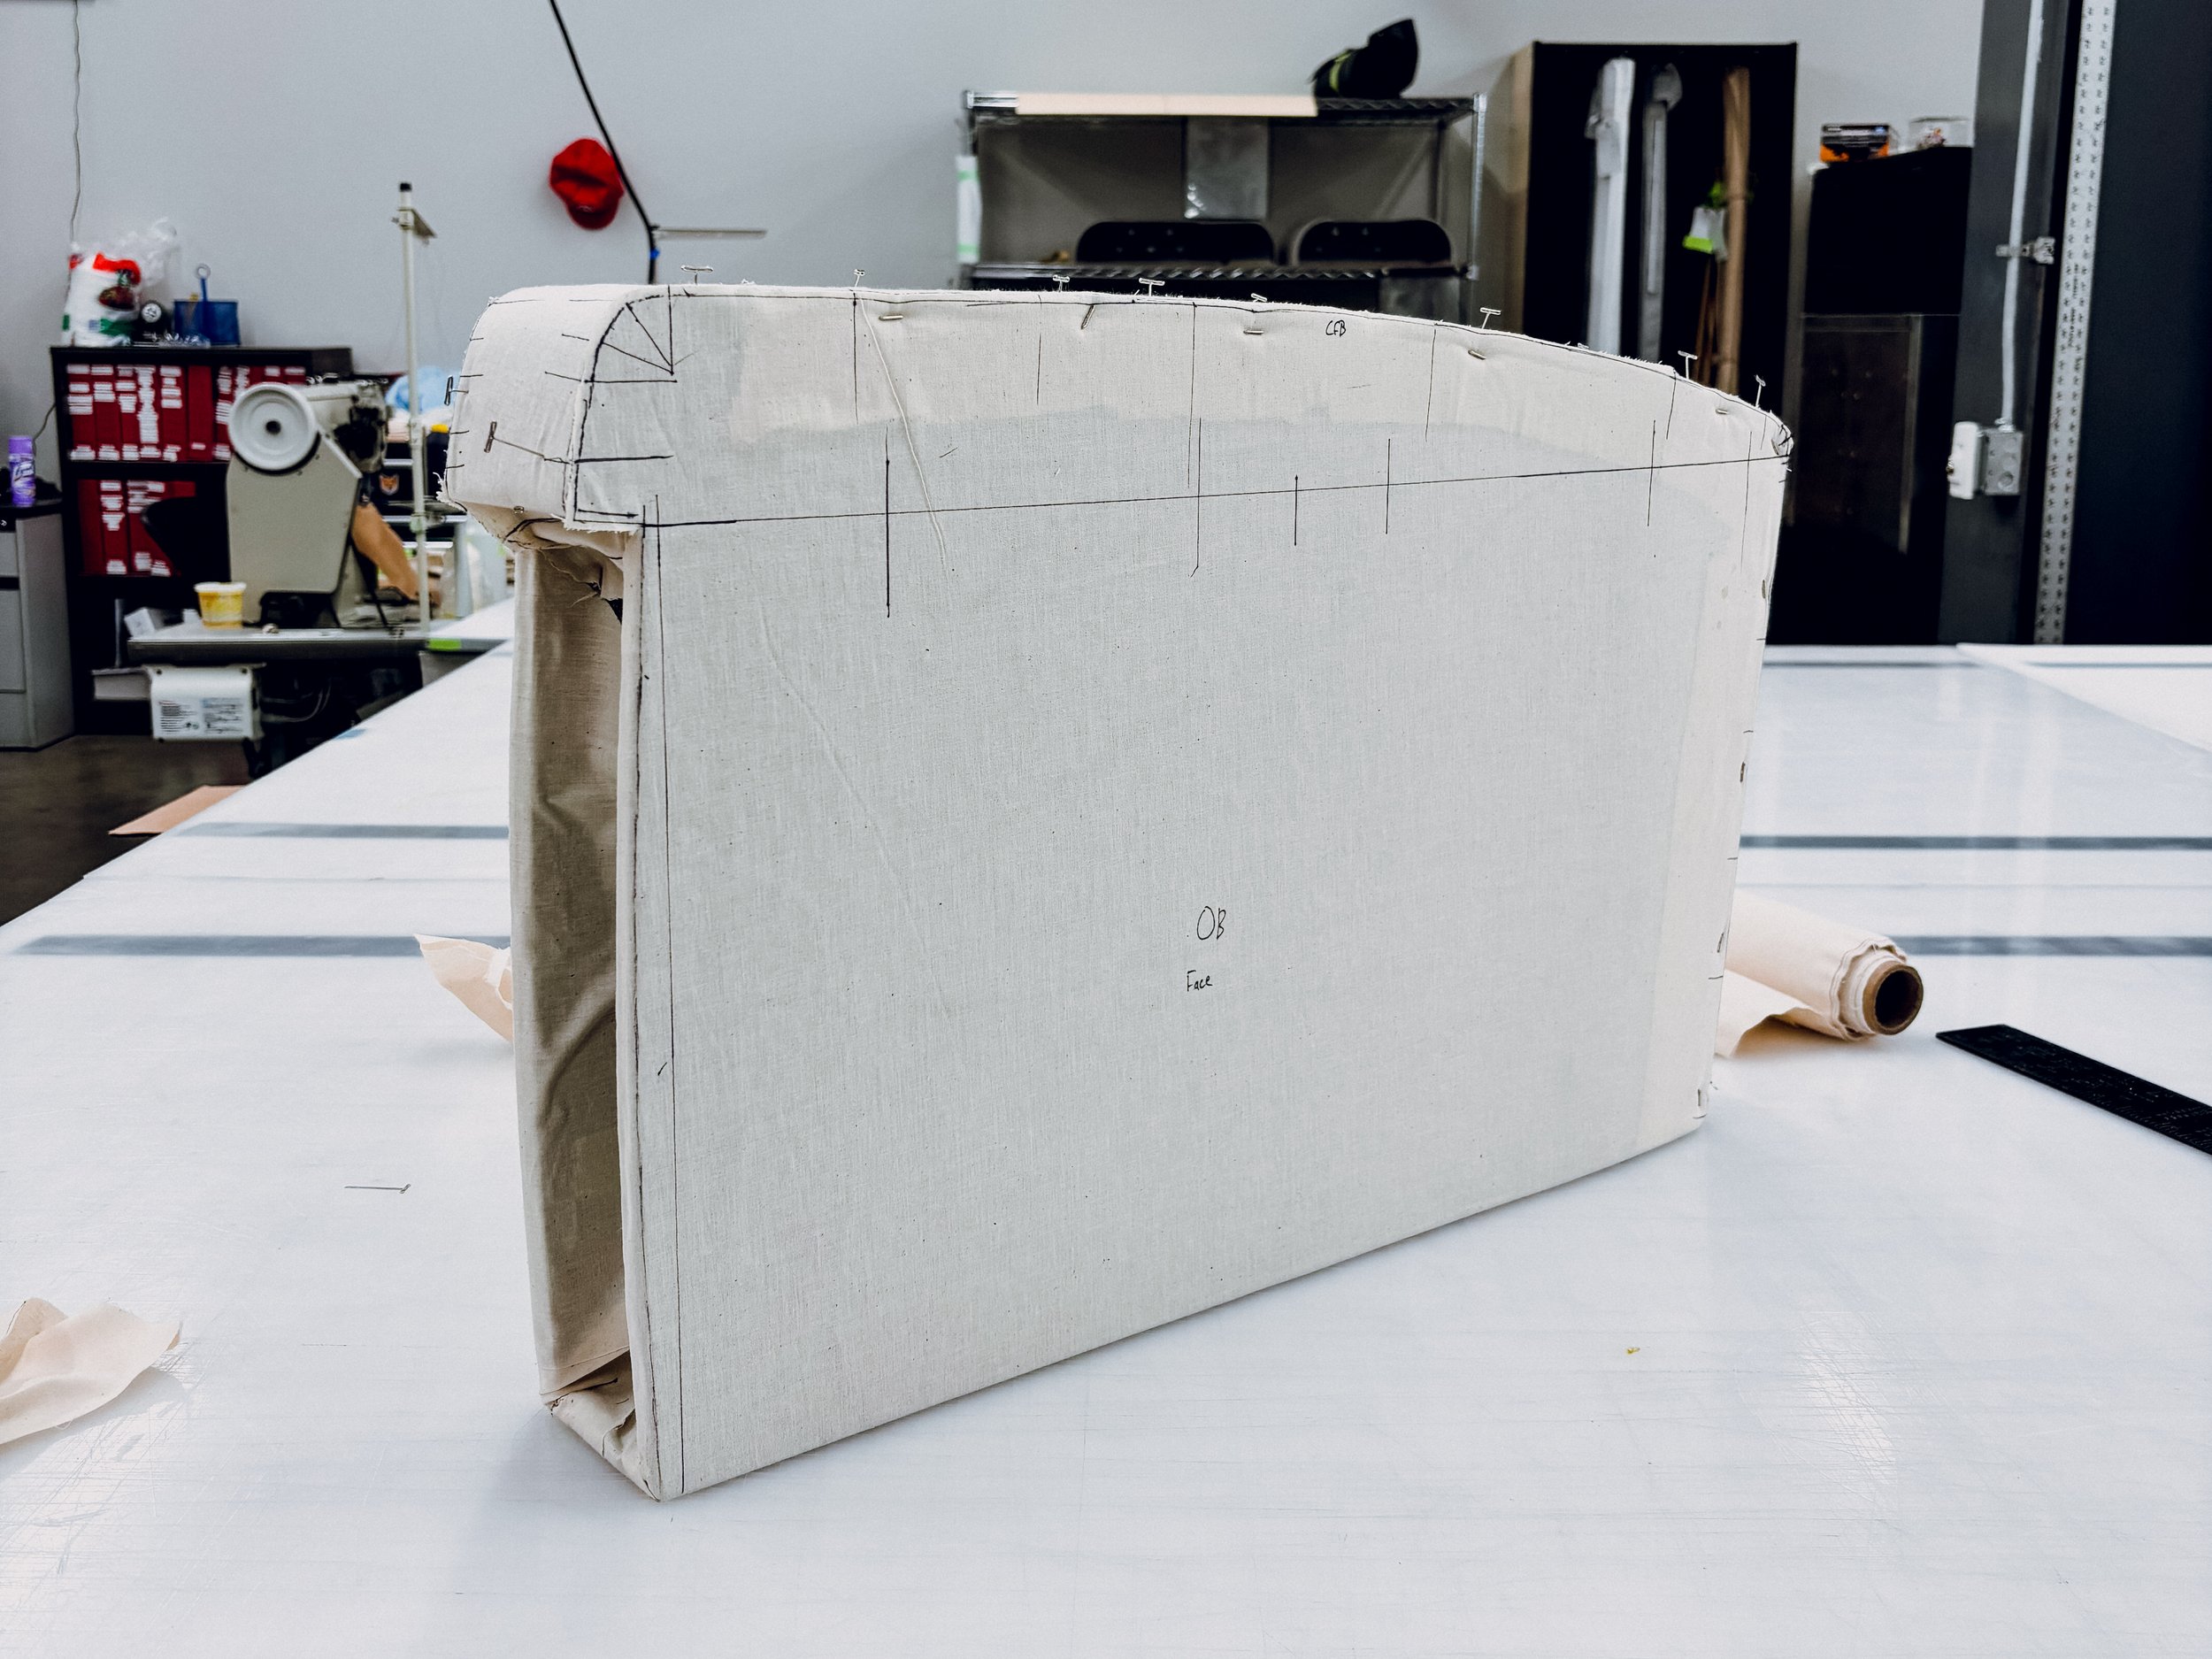
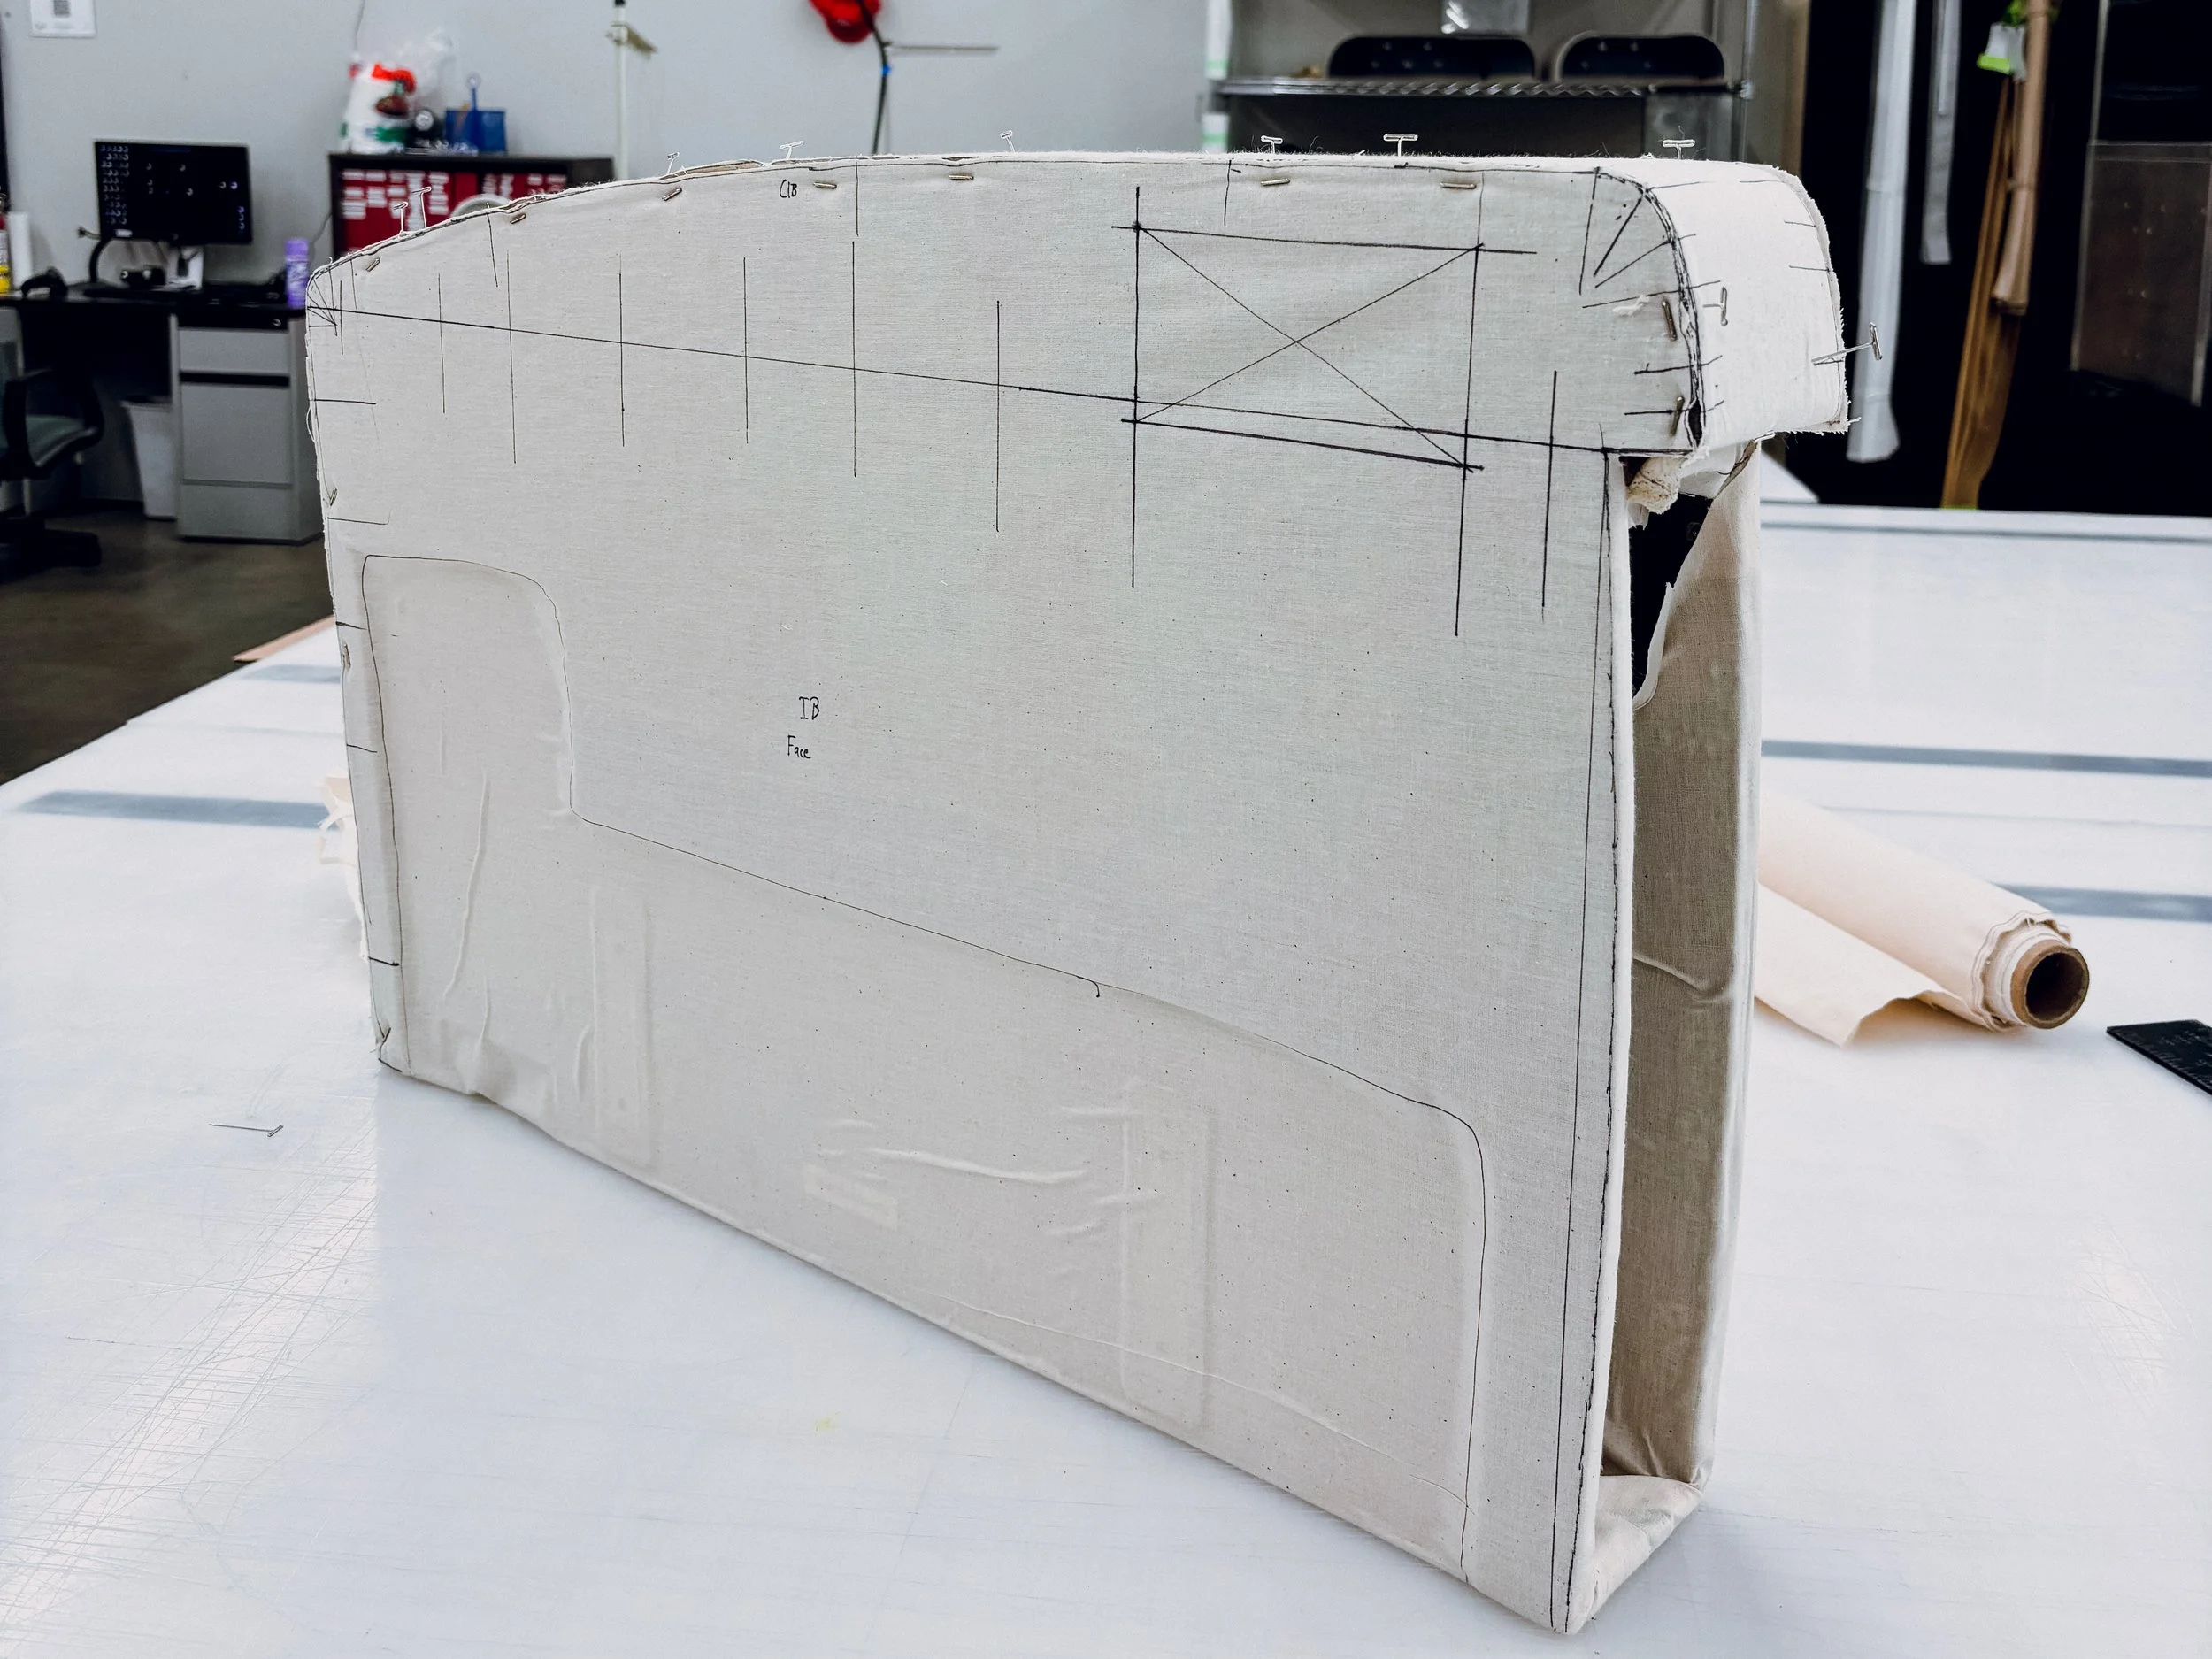
Oftentimes in my experience in aviation, hearing that the next project was “simpler” was actually indicative of the the opposite. There were multiple, gentle curves that met to form tight corners creating valleys and peaks of material all that had to be top stitched and having that top stich match up with other, independently made pieces was a huge challenge. Initially I was to use the double-needle top stich machine that I had repaired and got into working order, but at the last minute I was informed I had to do this task on the brand new machines that had yet to be properly set up or tested. In the photos above you can see my process for ensuring my pattern was as informed and accurate as I could make it, knowing I’d be facing a myriad of issues when sewing it. While I find sewing rather straight-forward in most cases, the new machines posed significant issue. I would regularly have to stop because of machine error, diagnose it, consult information and guides on how to fix said issues and continue on. After completing the covers, my next priority was to maintain consistent pull all around the arm, ensuring the top-stitch fell where it should as well as ensuring the accent sew line across the side remained straight. The latter was made more difficult by the subtle inward curve of the arm towards the back, creating an optical illusion of an upward slope. While the arm looks mostly complete in the final picture, I would go on to cleanly finish out the front and use heat across the surface of the arm to remove any wrinkling or noticeable spots. Installation of the doors were the final piece and those presented their own difficulties as well. As I previously mentioned, the doors were top stitched as well, with the side having only half an inch of material to be stitched on, making the top stitch of the doors and the arm meet required lots of repeated reworking.
Miscellaneous Side Projects
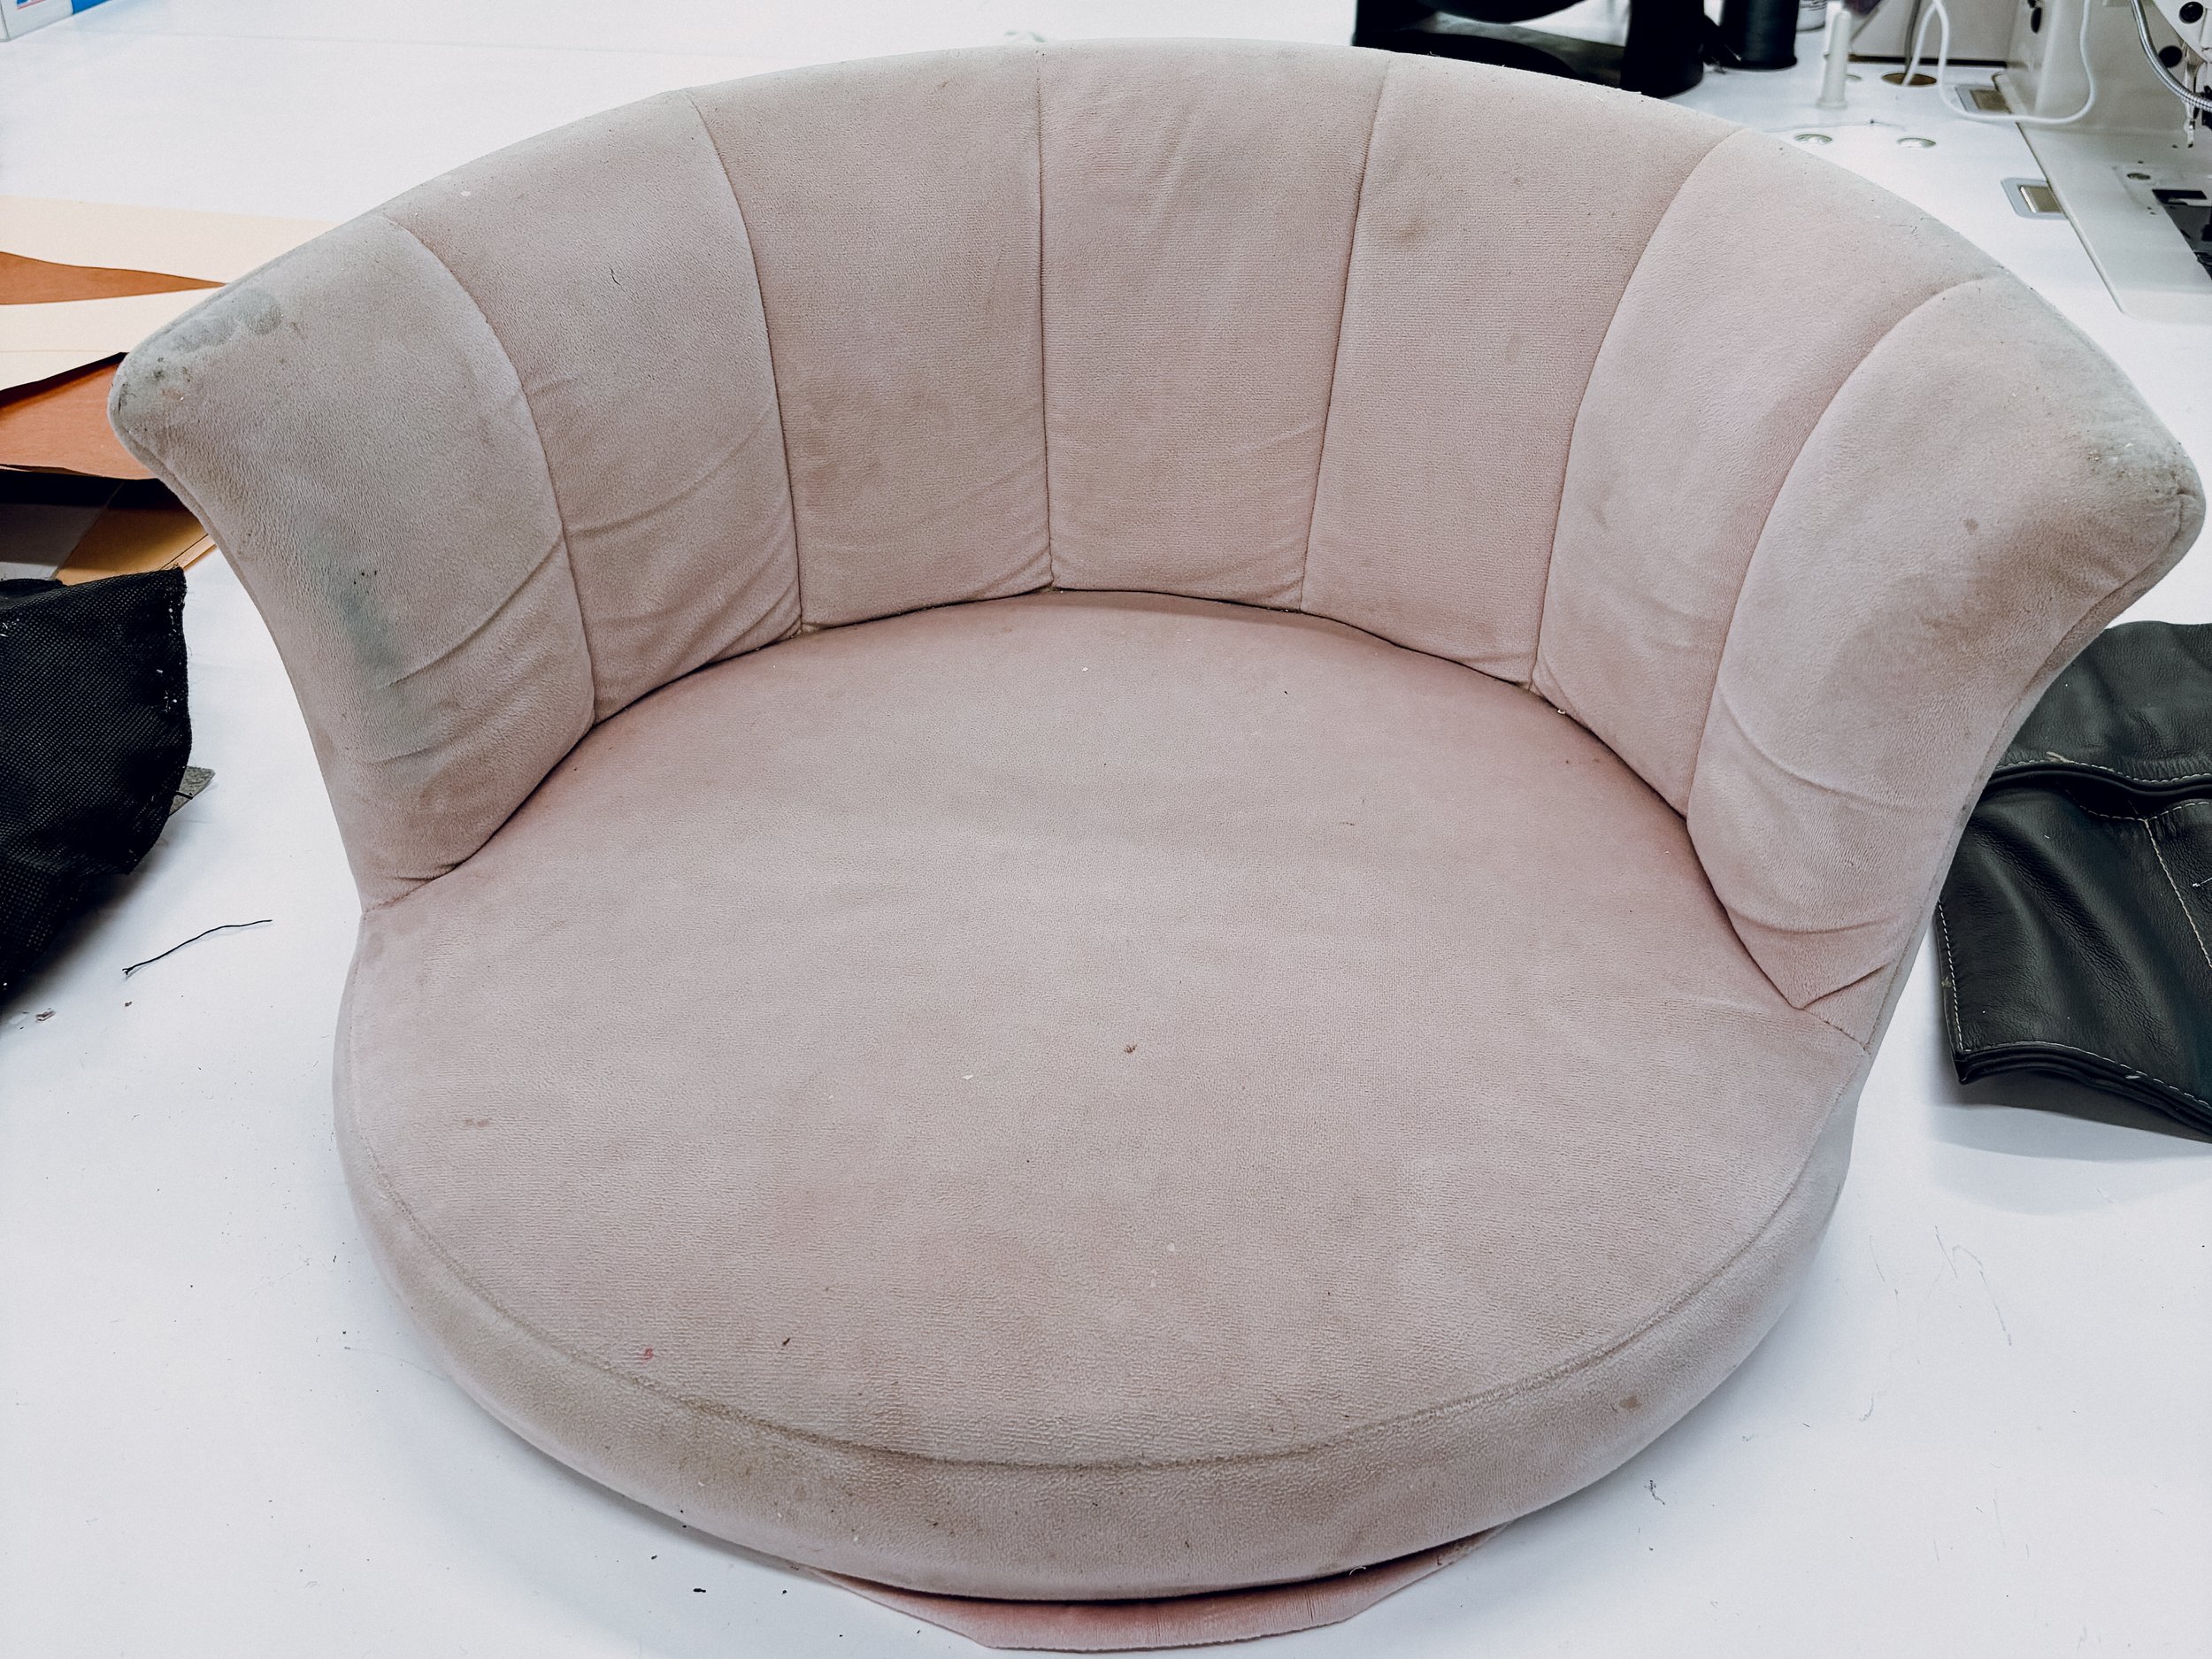
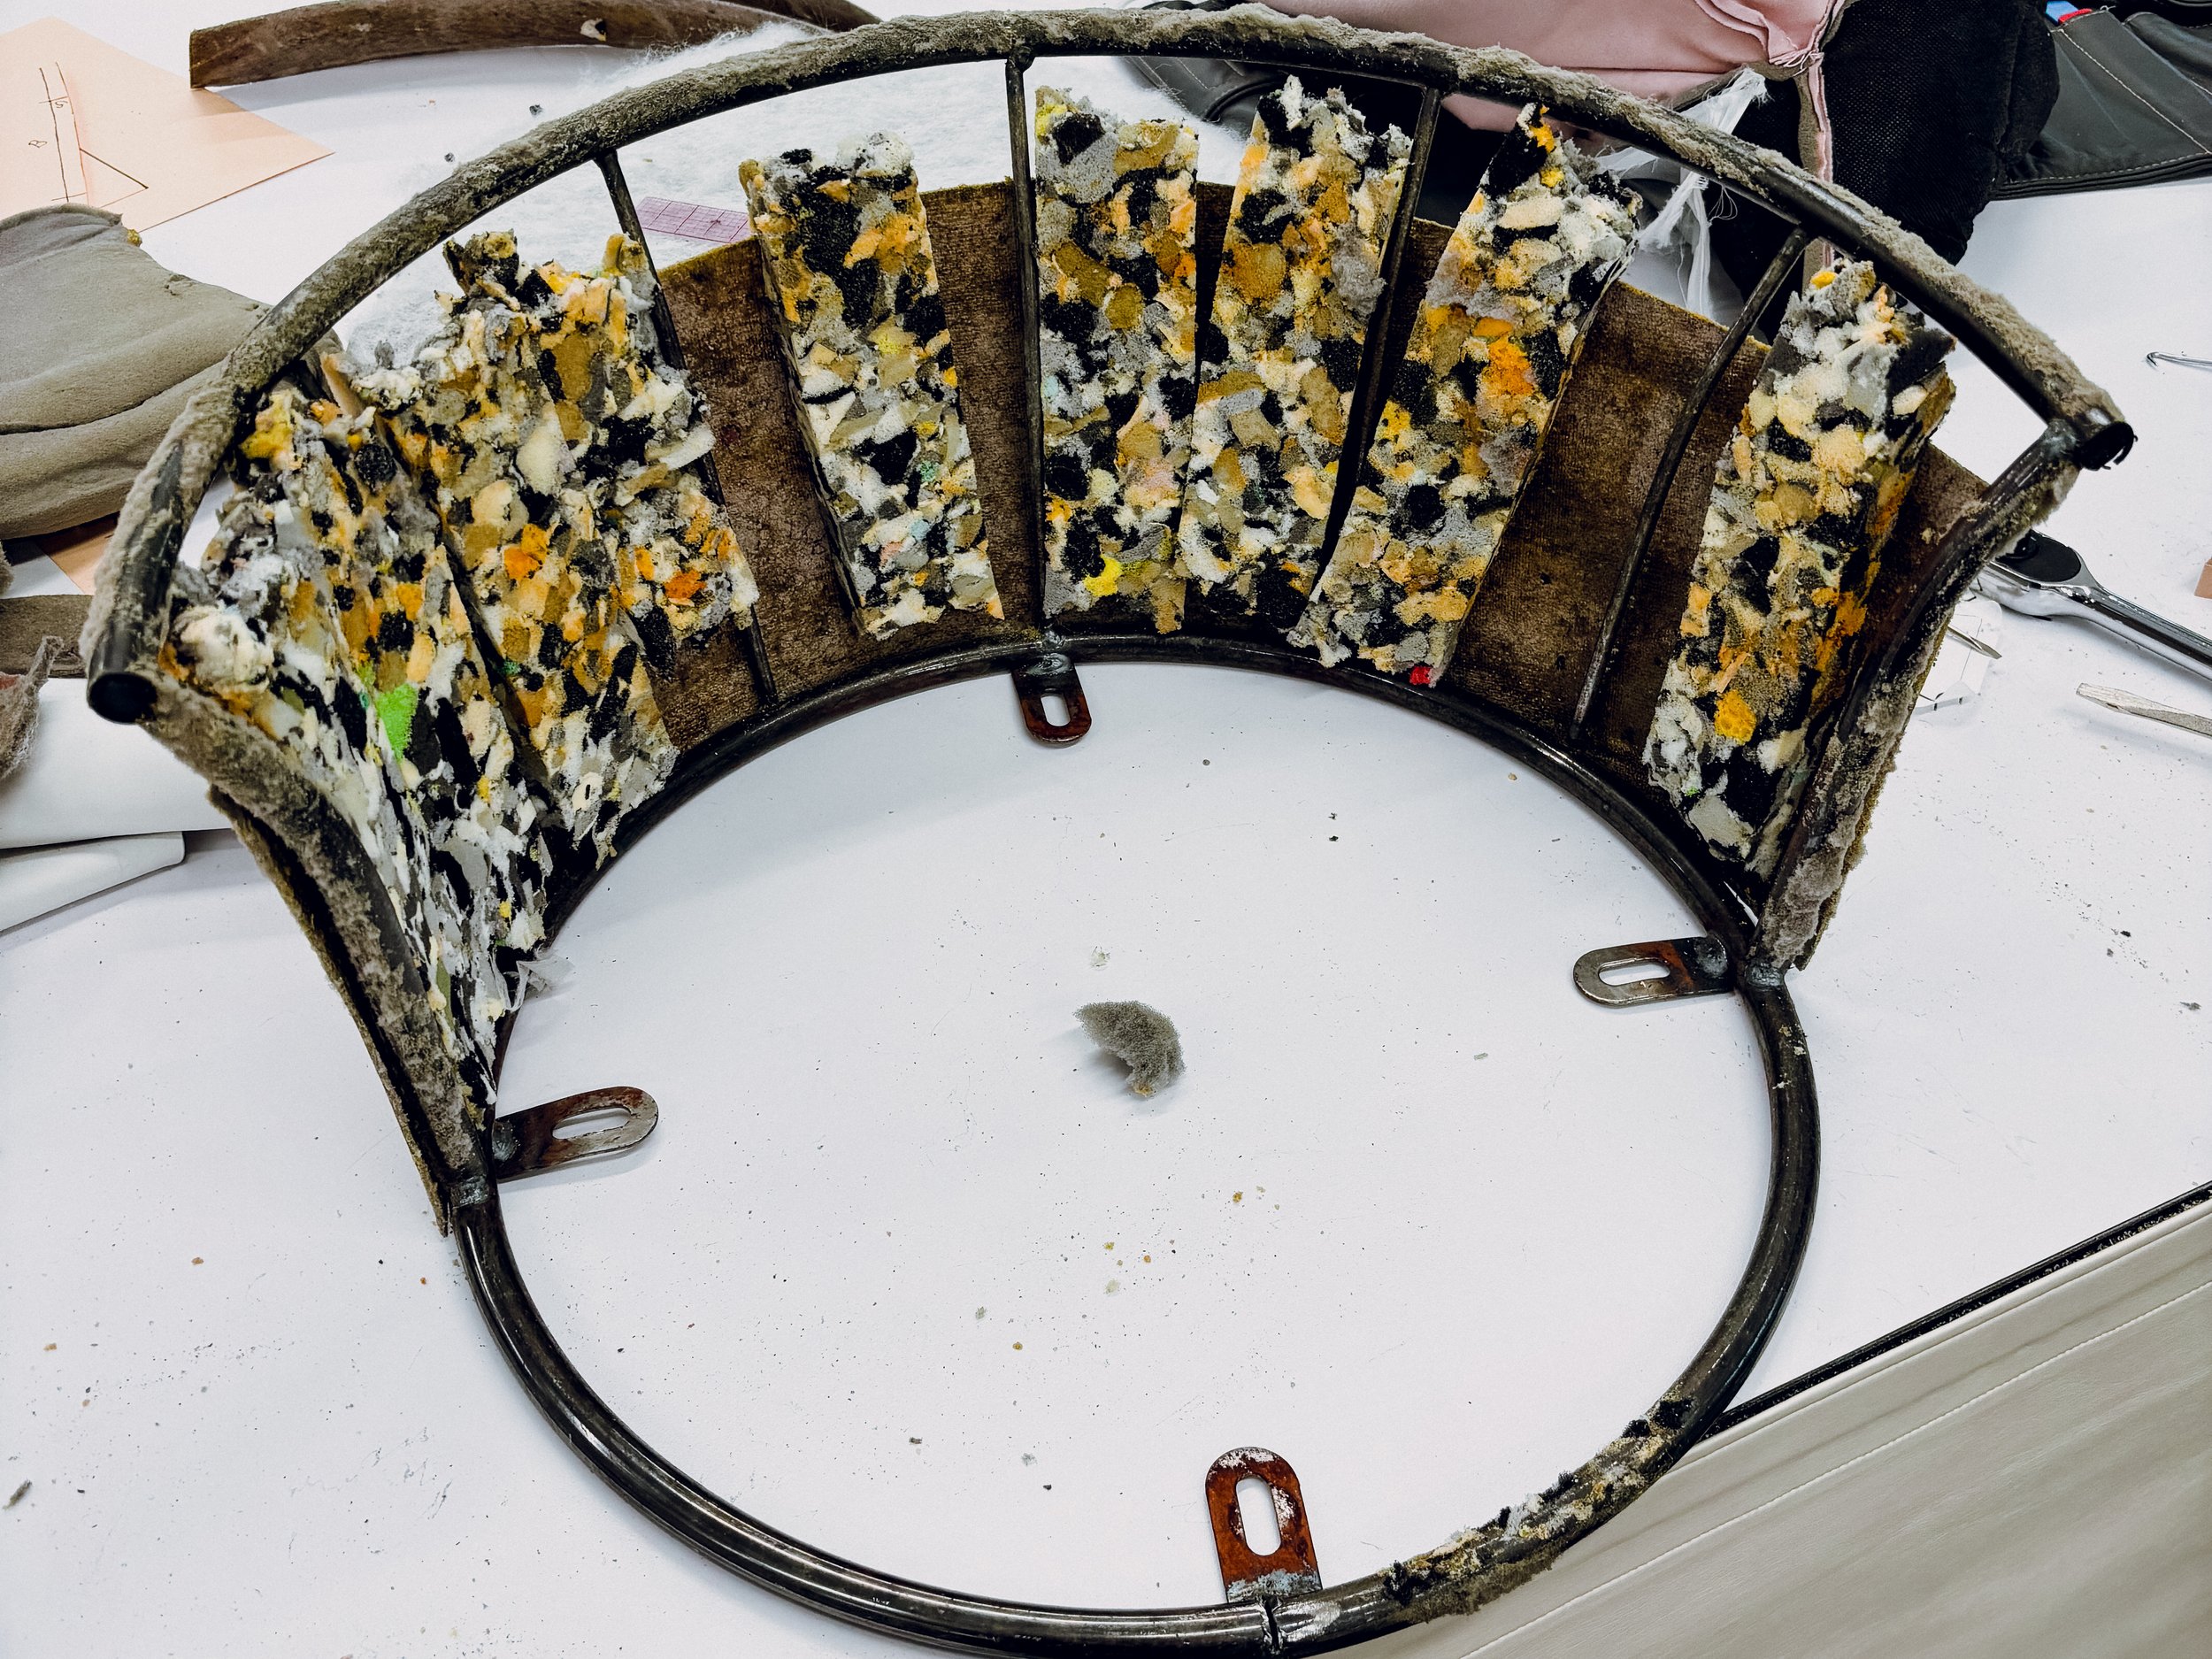
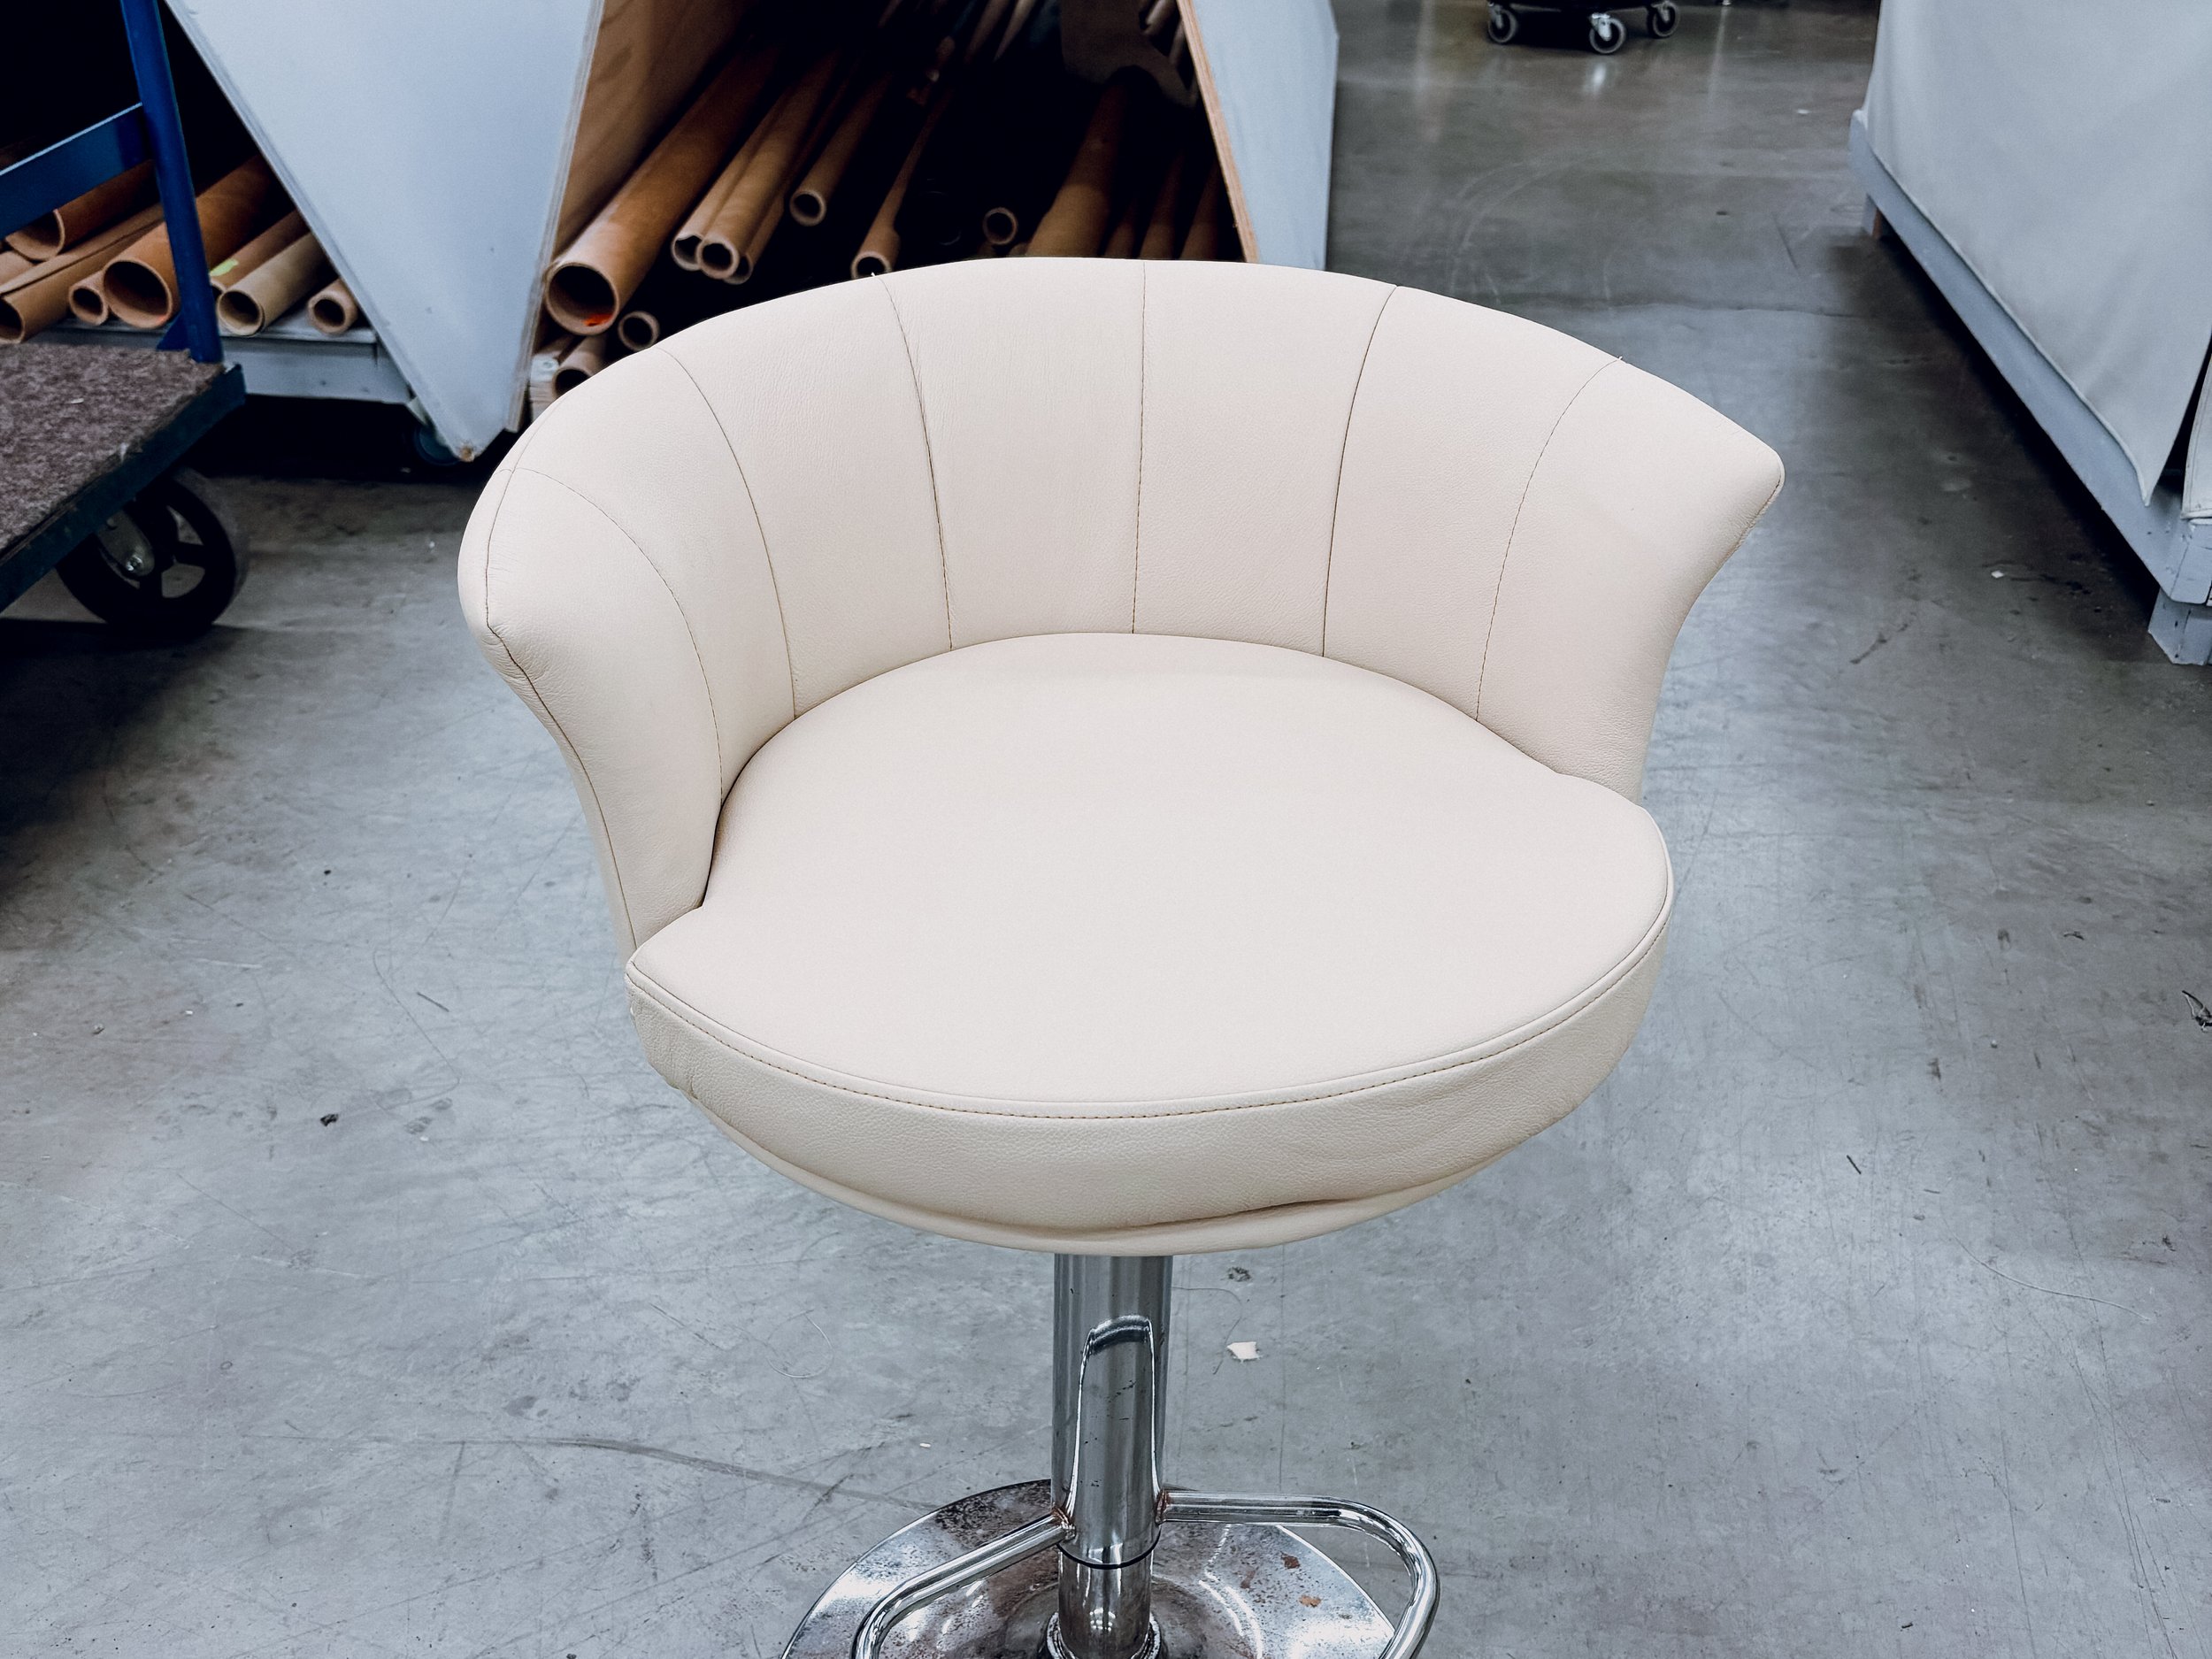
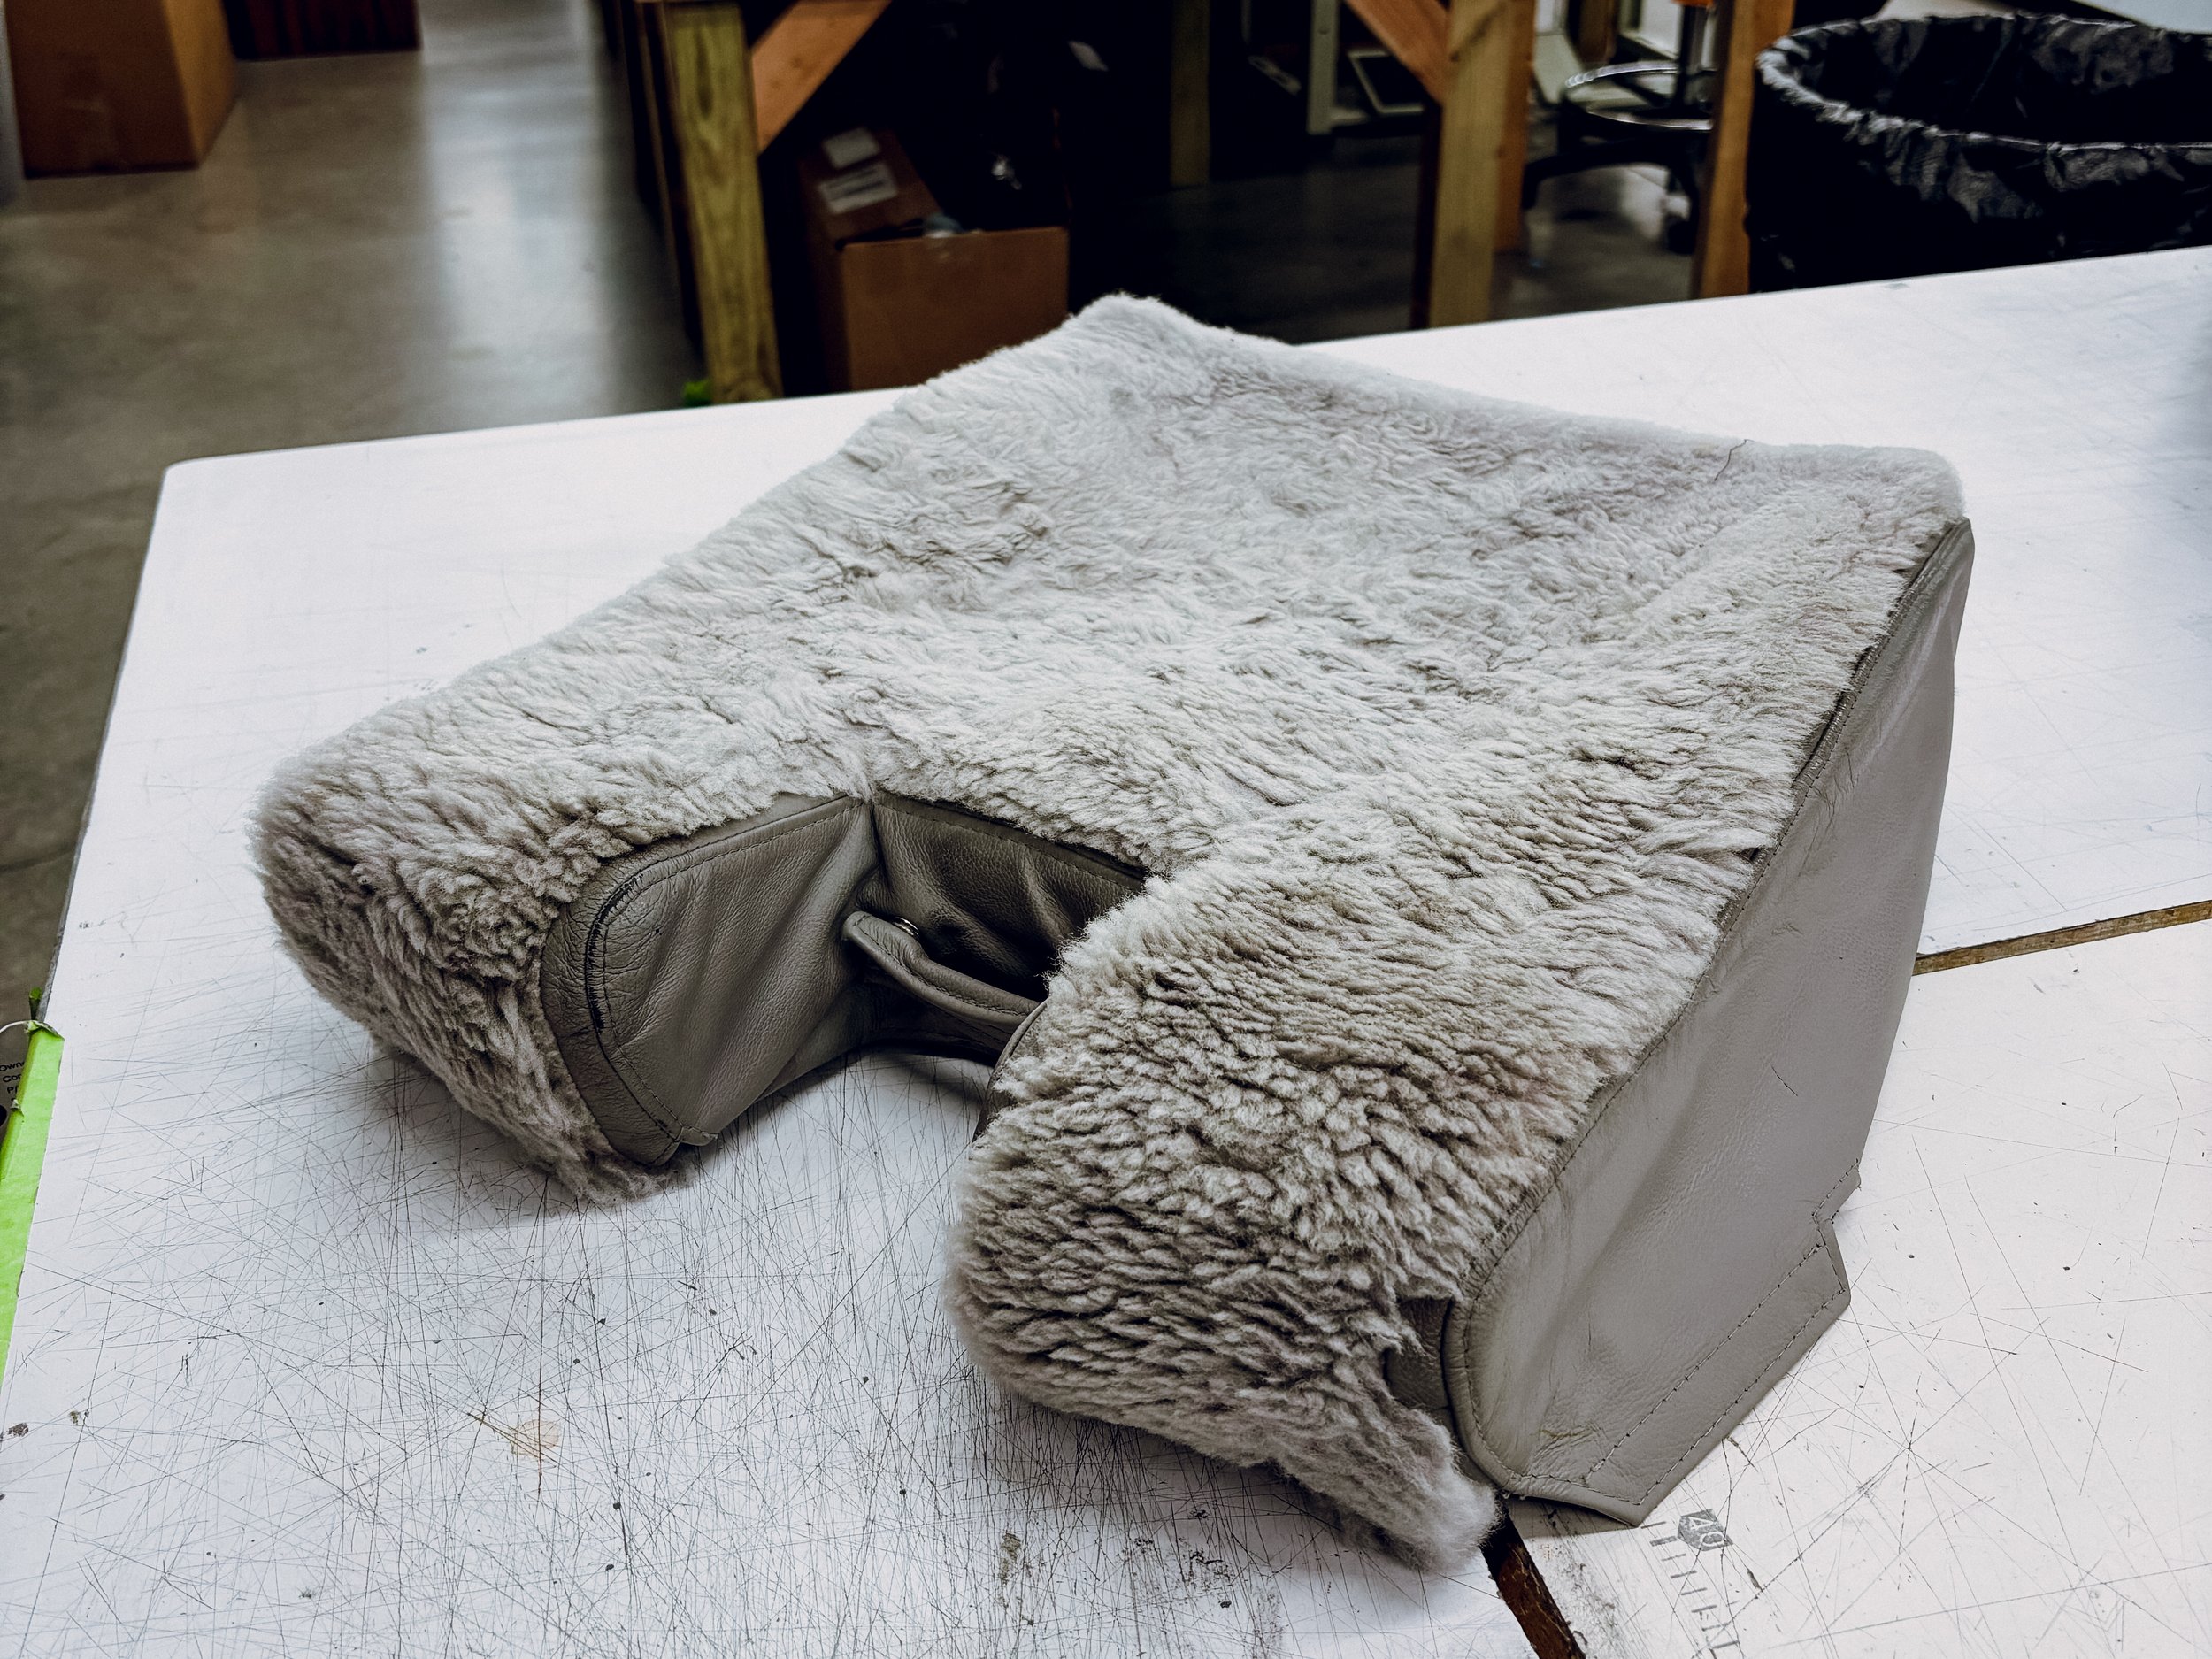
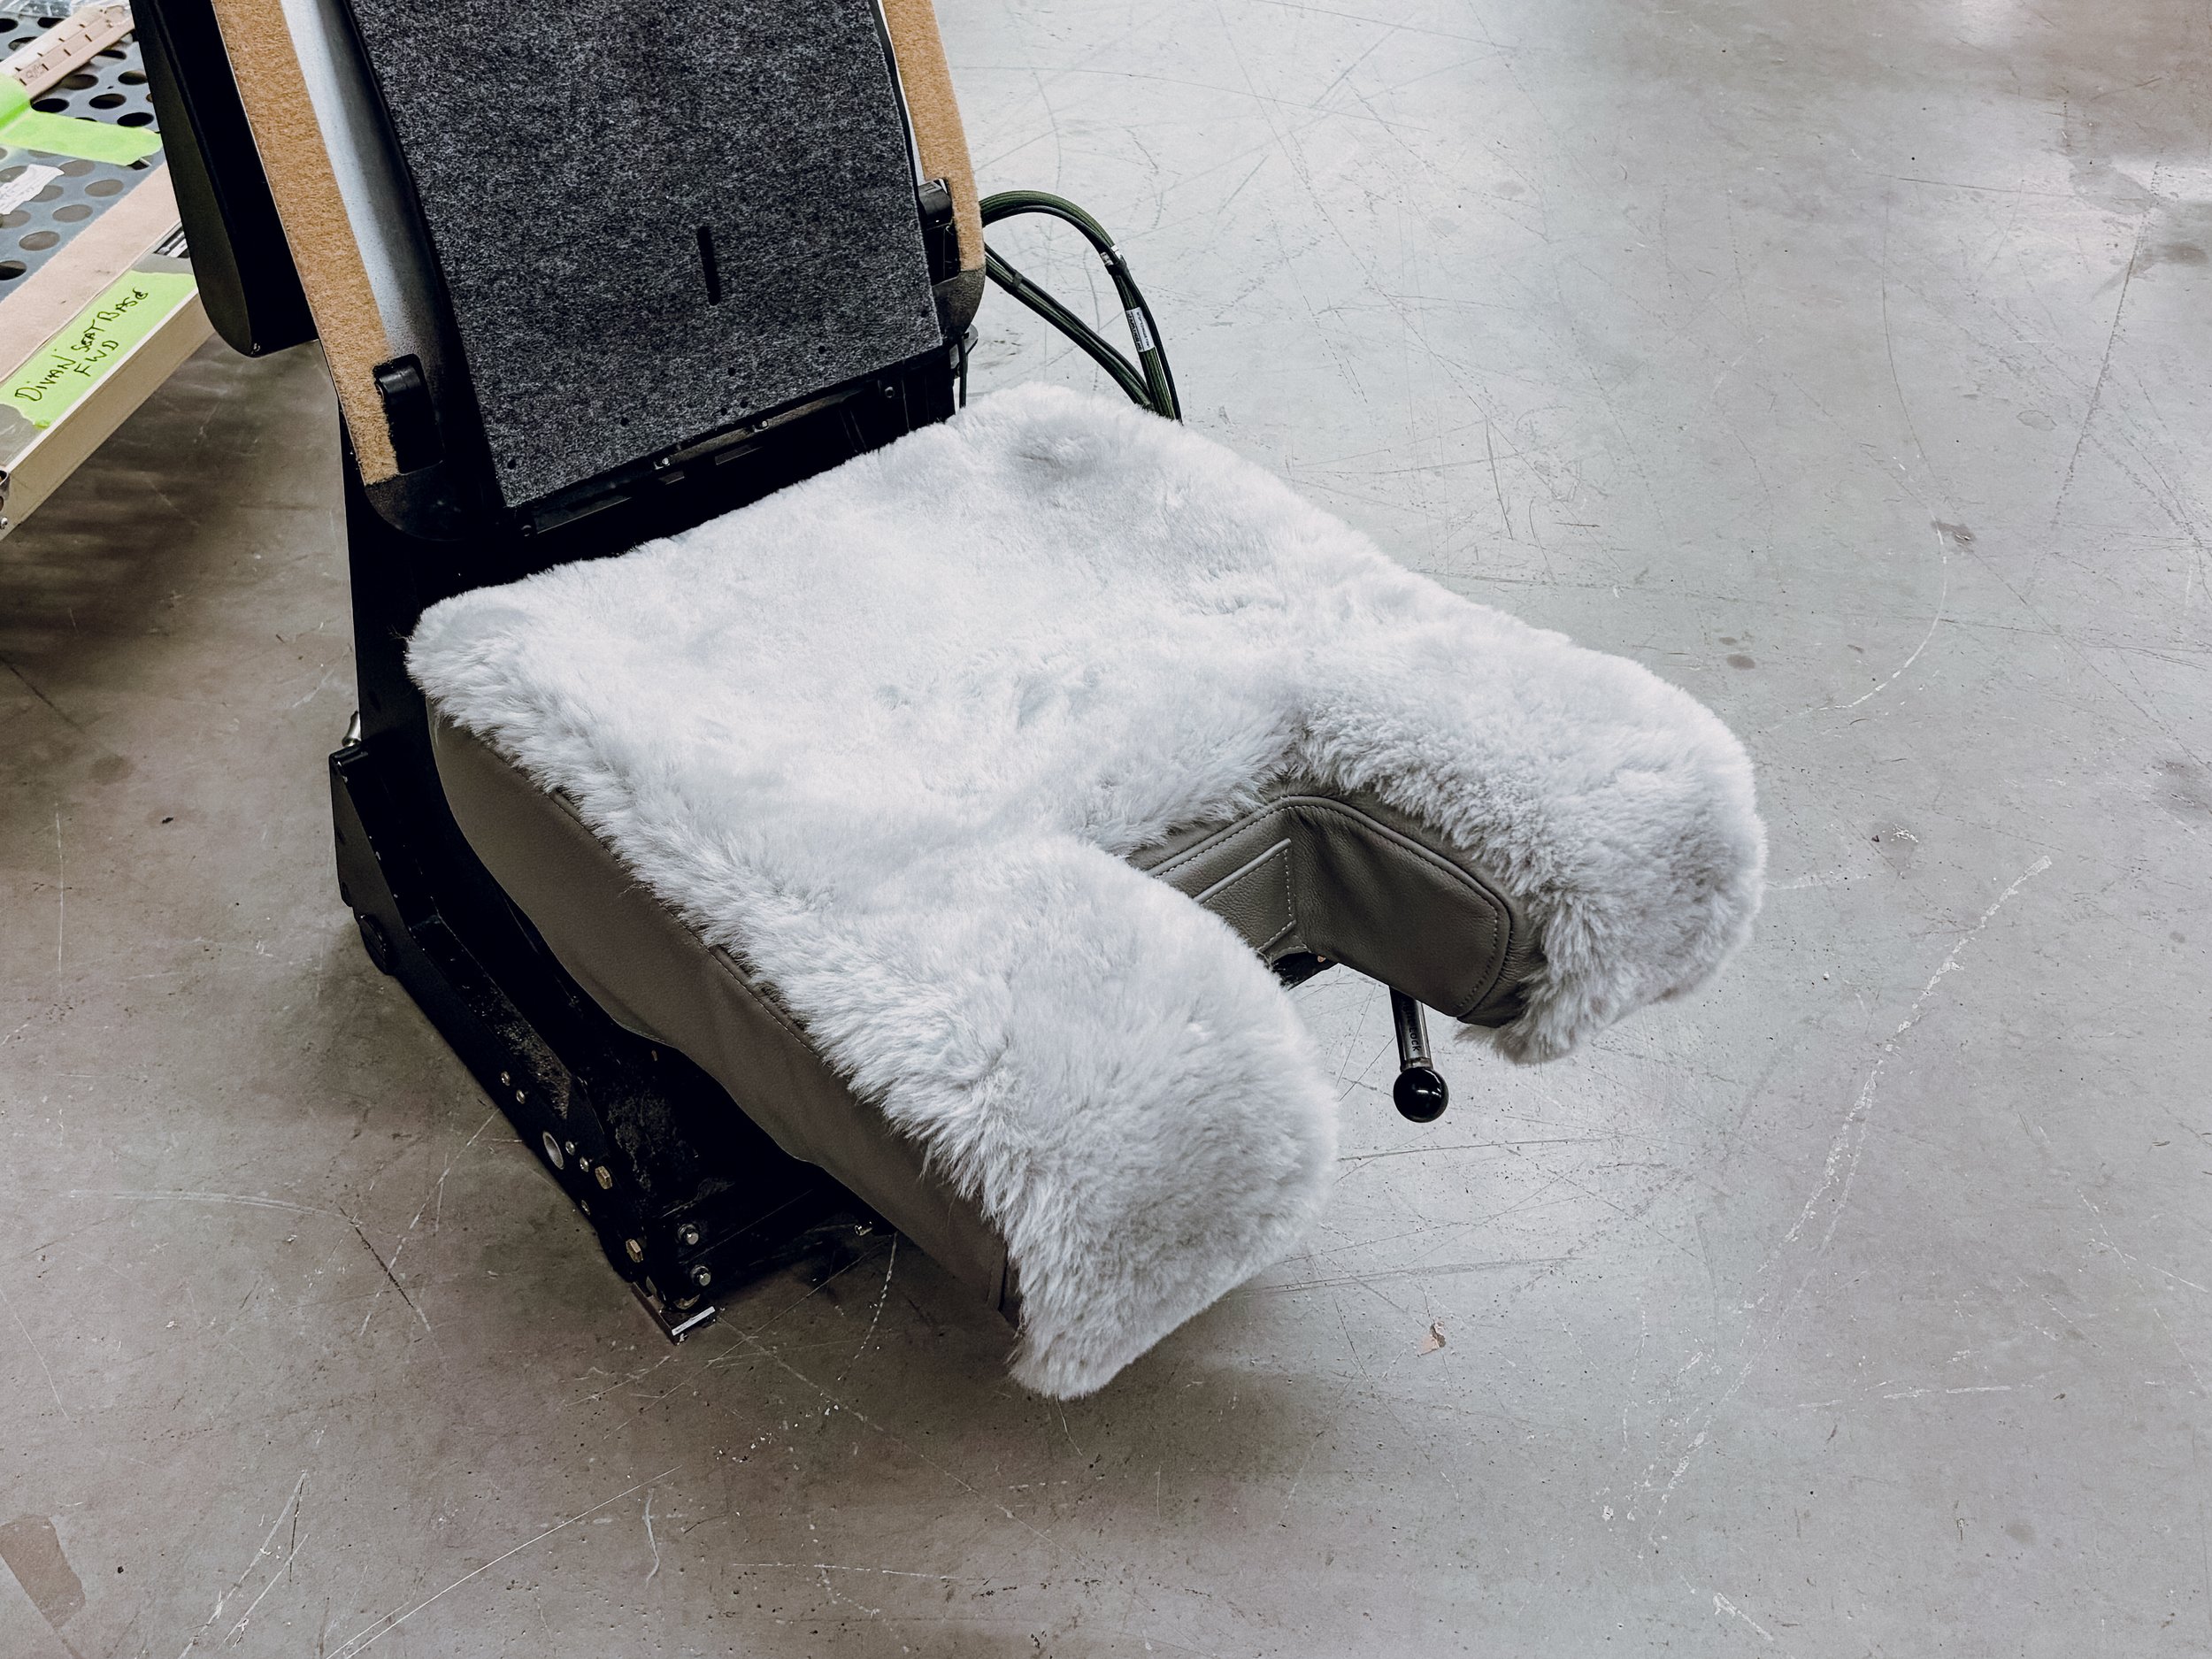
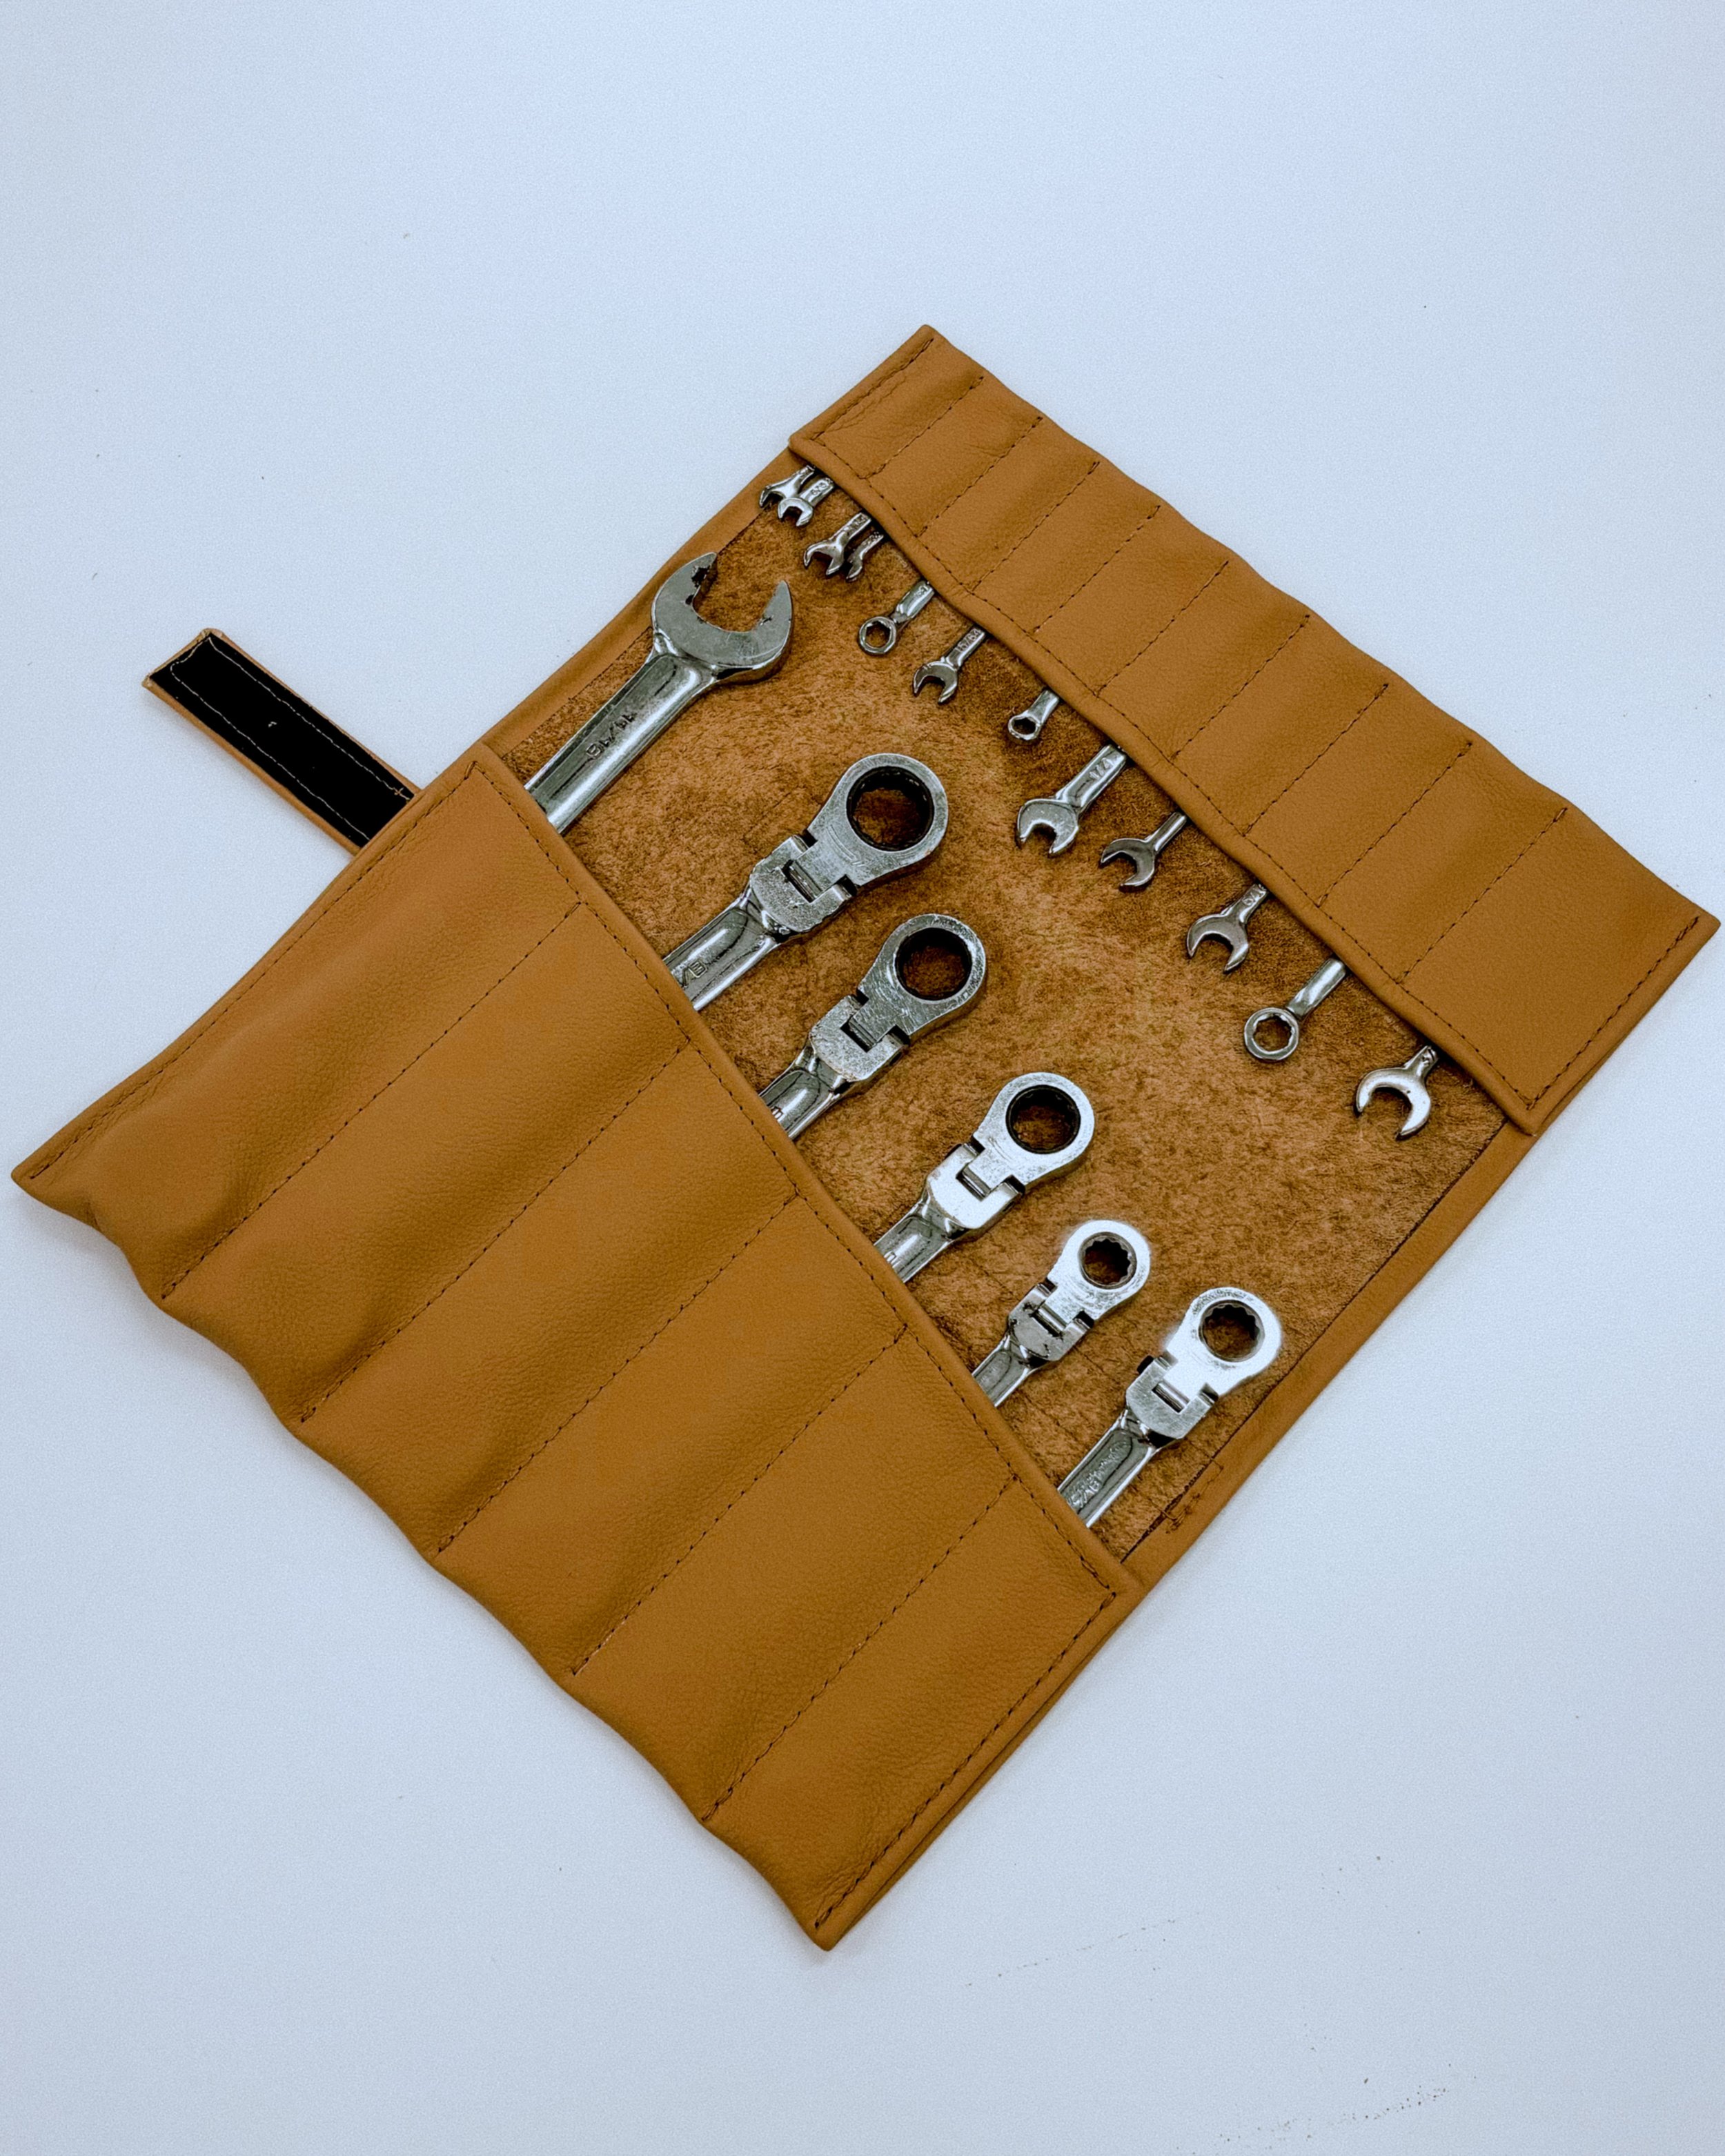
Occasionally we’d reach slow points throughout the year and in those moments I would be given tasks that were not urgent or were explicitly for shop use only. The first three images are a chair that someone in a different department had brought in that they wanted completely redone. You can see the initial sorry state the chair’s original cover was in as well as its “foam” and inner structure. I made a pattern based off the original cover initially, before completely changing how I wanted it to finish out. Instead of making the back rest and cushion cover one piece I opted to make them two separate pieces as they both pulled to the wooden frame underneath the seat cushion. I also sculpted and installed more foam than was originally present at the request of the person who brought it to me. This project presented me with the freedom in deciding how exactly I wanted to do things and I learned a lot from it. If I were to do it again, there’s definitely things I’d change, but I feel better equipped going forward. The following two images are the cushions of a pilot seat I was responsible for. The first image being the state of which it arrived in and the second being the finished cover. It was my first time working with sheep skin. Sheep skin is a very thin leather that needs to be made even thinner for the point of sewing. You have to walk a fine line of skiving leather while also having enough to maintain it’s structural integrity. On top of that you need to essentially give the hide a hair cut so that the fur doesn’t get caught when stitching. Combine that with the complicated and rigid pilot seat foam and you’ve got quite the challenge on your hand. The final image was similar to things I was tasked with frequently in these downtimes, which was making tool bags or rolls for other techs in the hangar. It was always fun finding new ways to make them slightly better and designing them around specific tools or needs. If only I had access to certain tools that are more bag-specific I would have loved to have made even more.